
Objective
This SOP explains how to manually download a commission statement from Medico and how to use ComTrack’s Retrieve feature to automate the process. It also outlines how to interpret the key fields on the statement so team members can understand payment details, commission calculations, and advance balances.
Key Steps
1. Log in and navigate to the commissions section 0:08
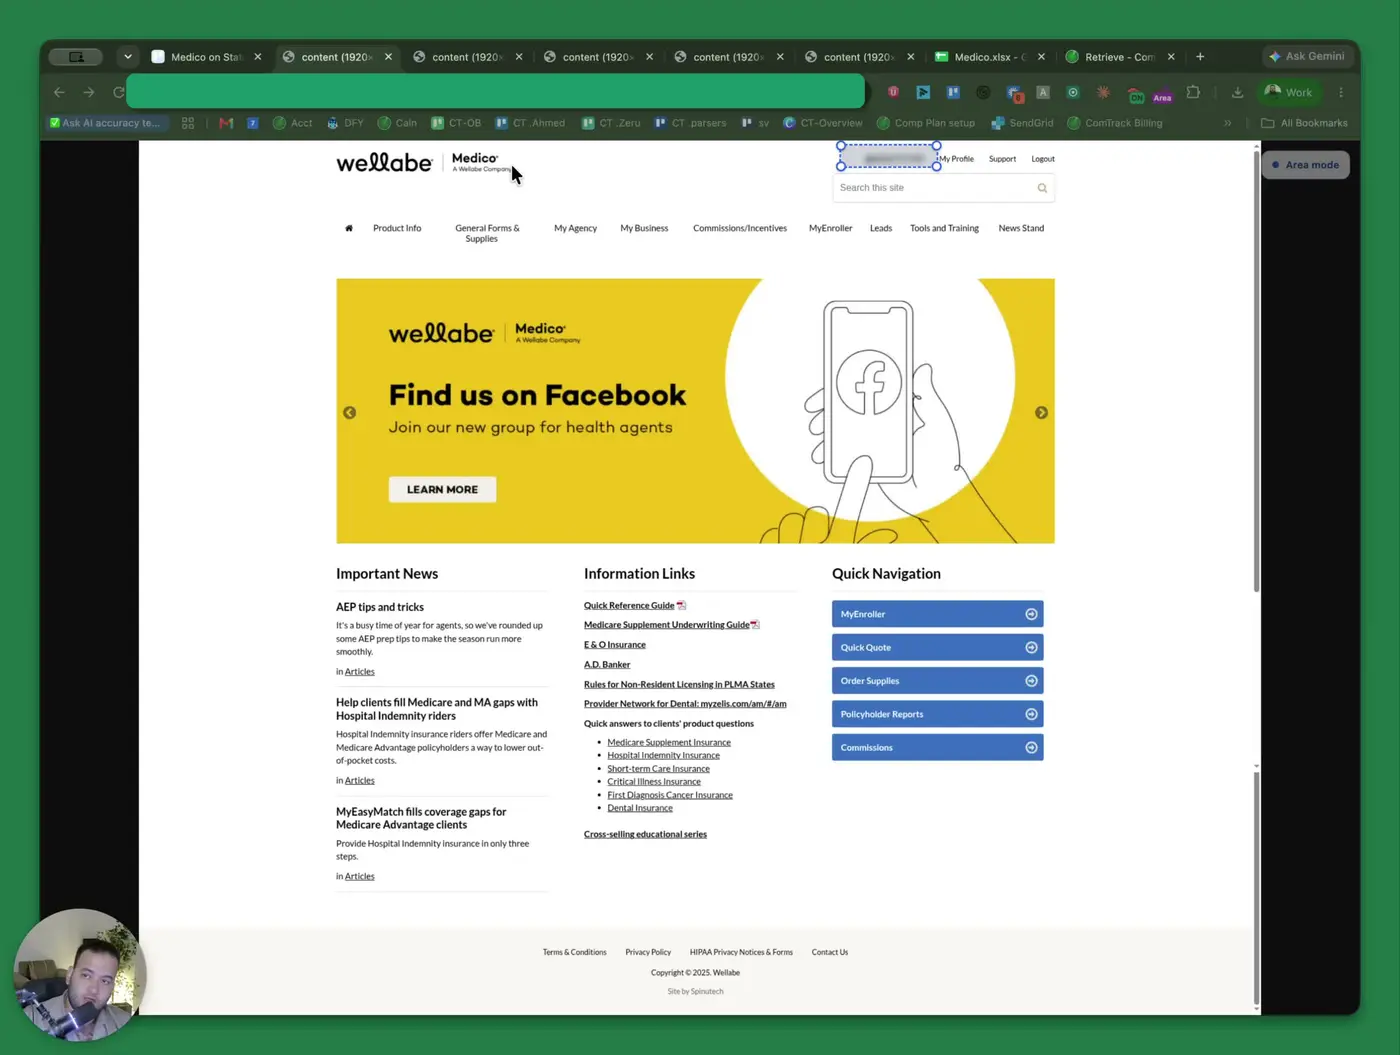
- Log in to the Medico portal.
- Complete 2FA authentication if prompted (for example, via text message).
- Click Commissions in the menu.
- Select the commissions area to access statement options.
2. Open the commission statement viewer 0:19
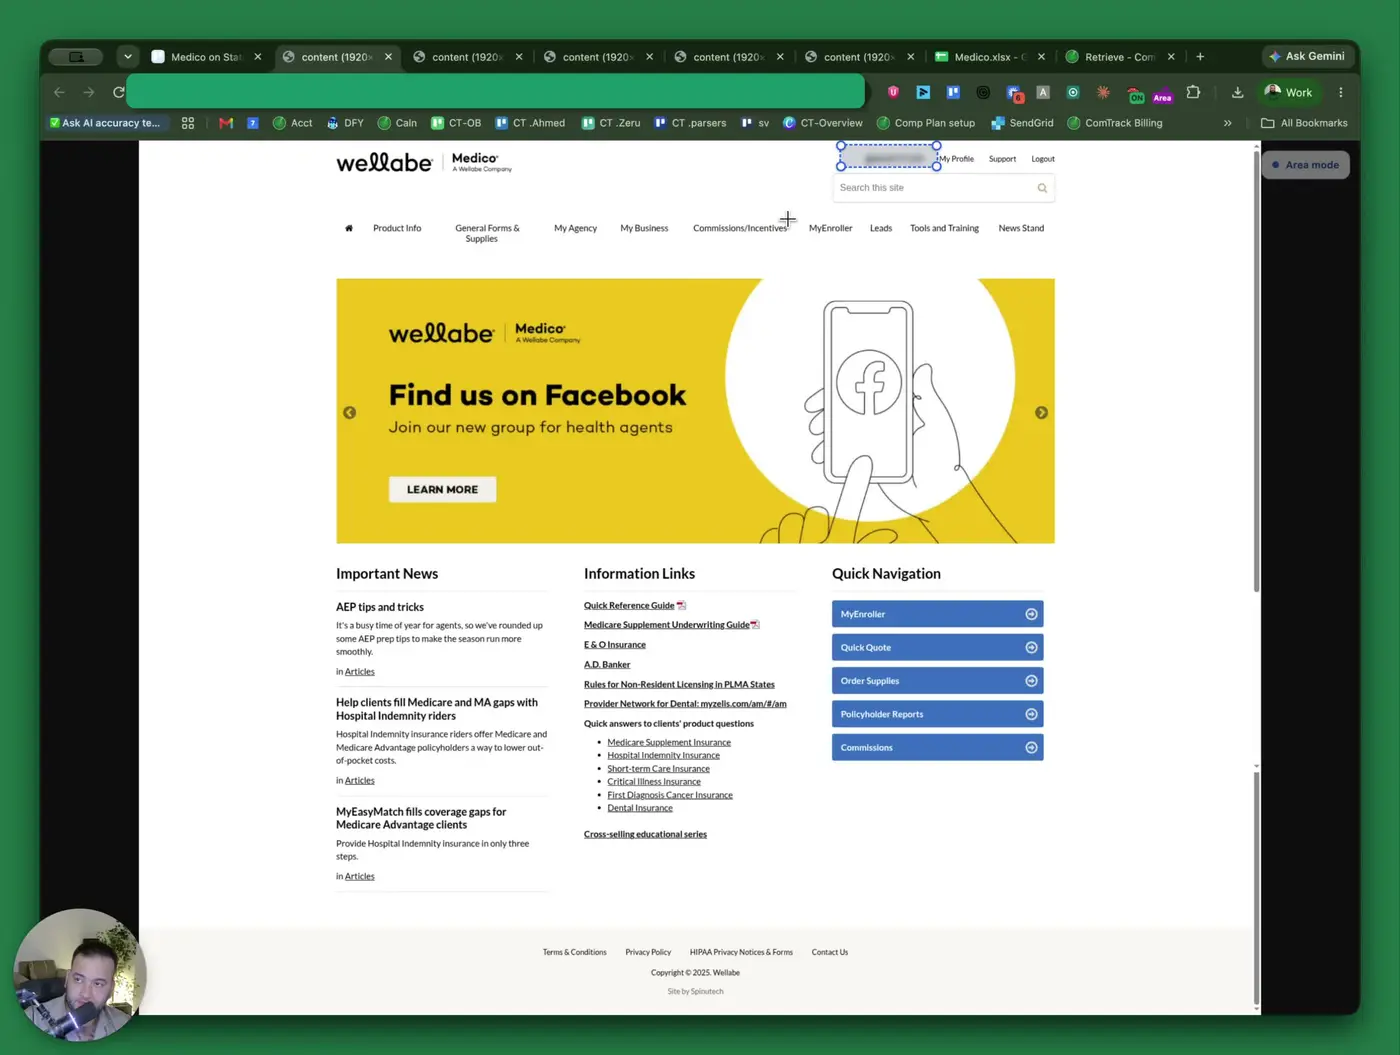
- On the commissions page, click View Commission Statements.
- Review the available statement options that appear.
- Choose the option that allows you to search by date range.
3. Select a statement date range and run the search 0:27
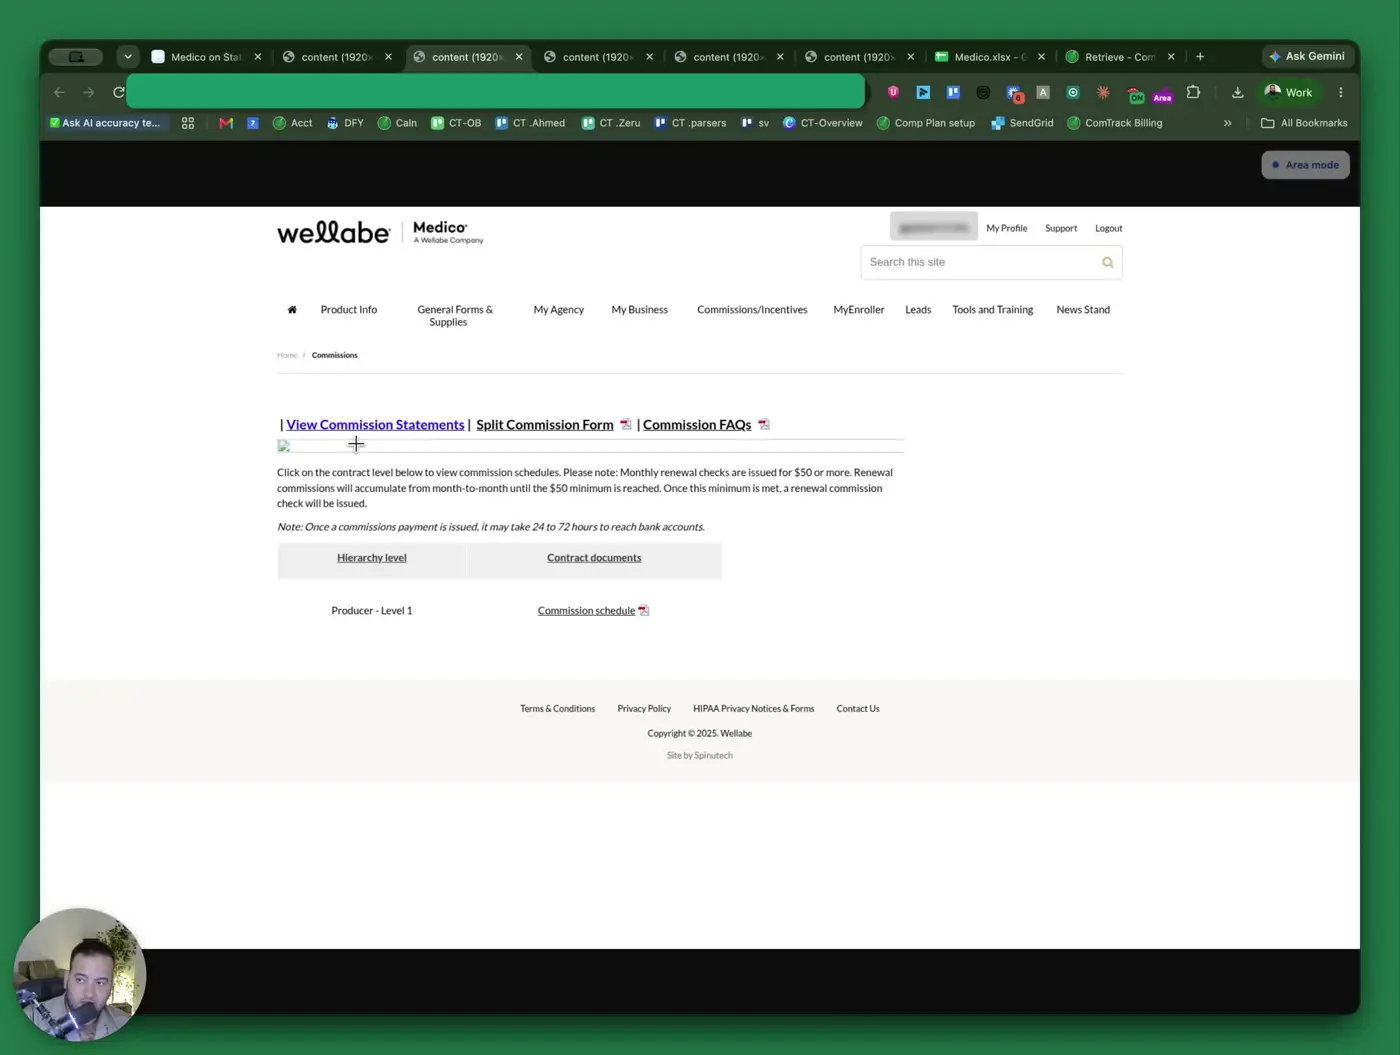
- Choose Statement Date Range from the available options.
- Enter a From date and a To date.
- Example: use a range such as the end of October through December 1.
- Click View Commissions to generate the statement results for that period.
4. Download the statement file 0:52
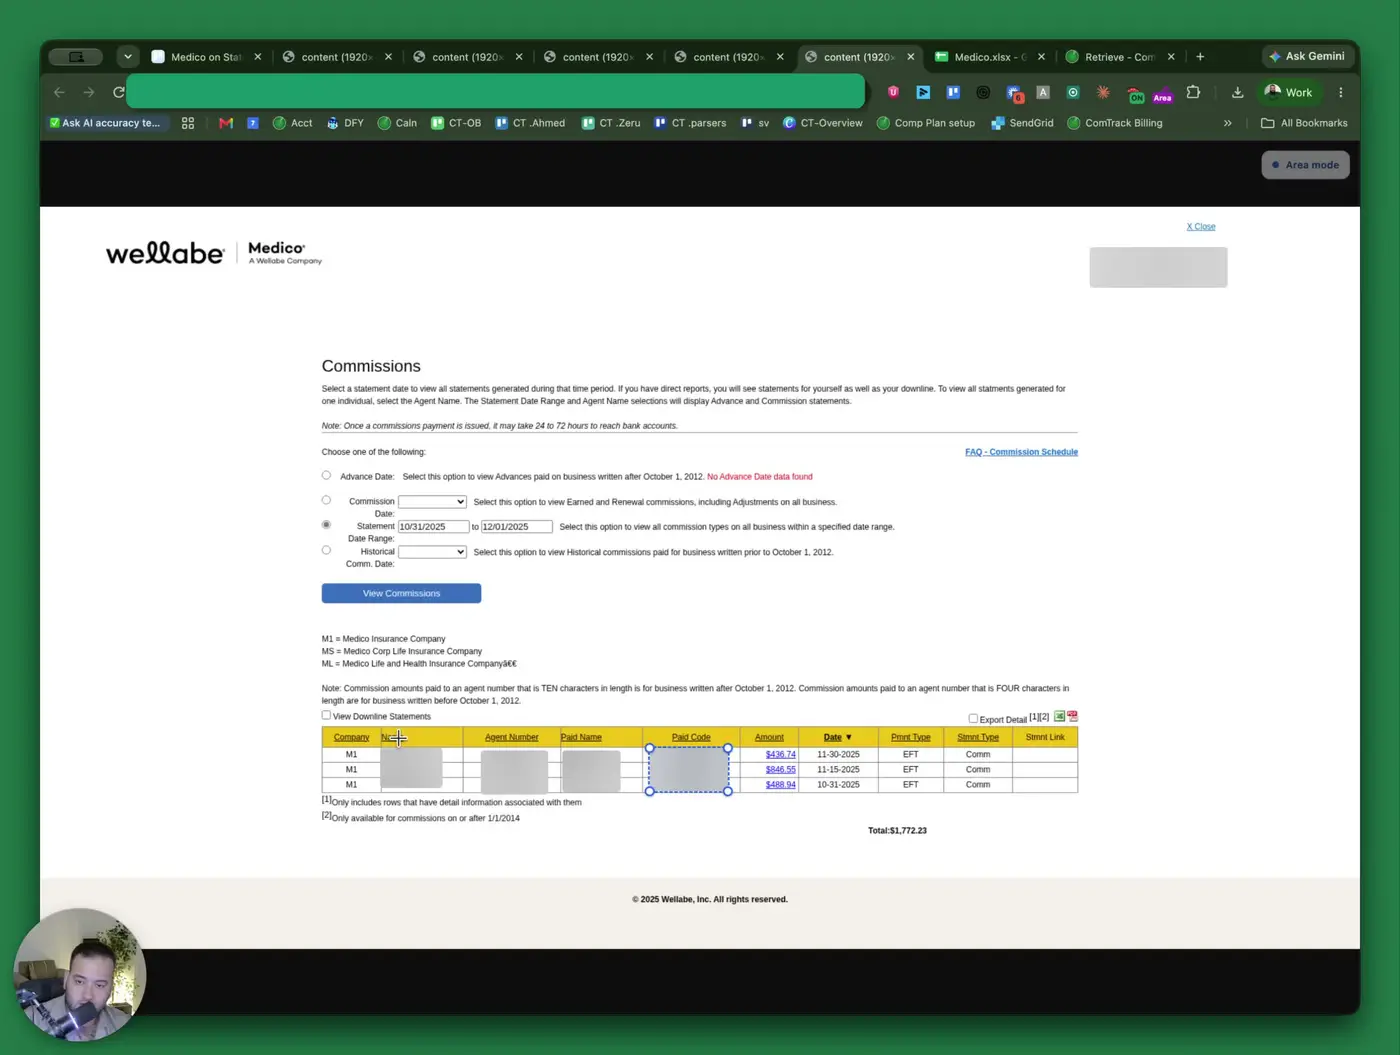
- Review the output options provided by Medico.
- Select Excel to download the full commission statement file.
- Save the file for later use in ComTrack or for internal tracking.
- Use CSV only if your workflow specifically requires that format.
5. Identify the main fields on the Medico statement 1:15
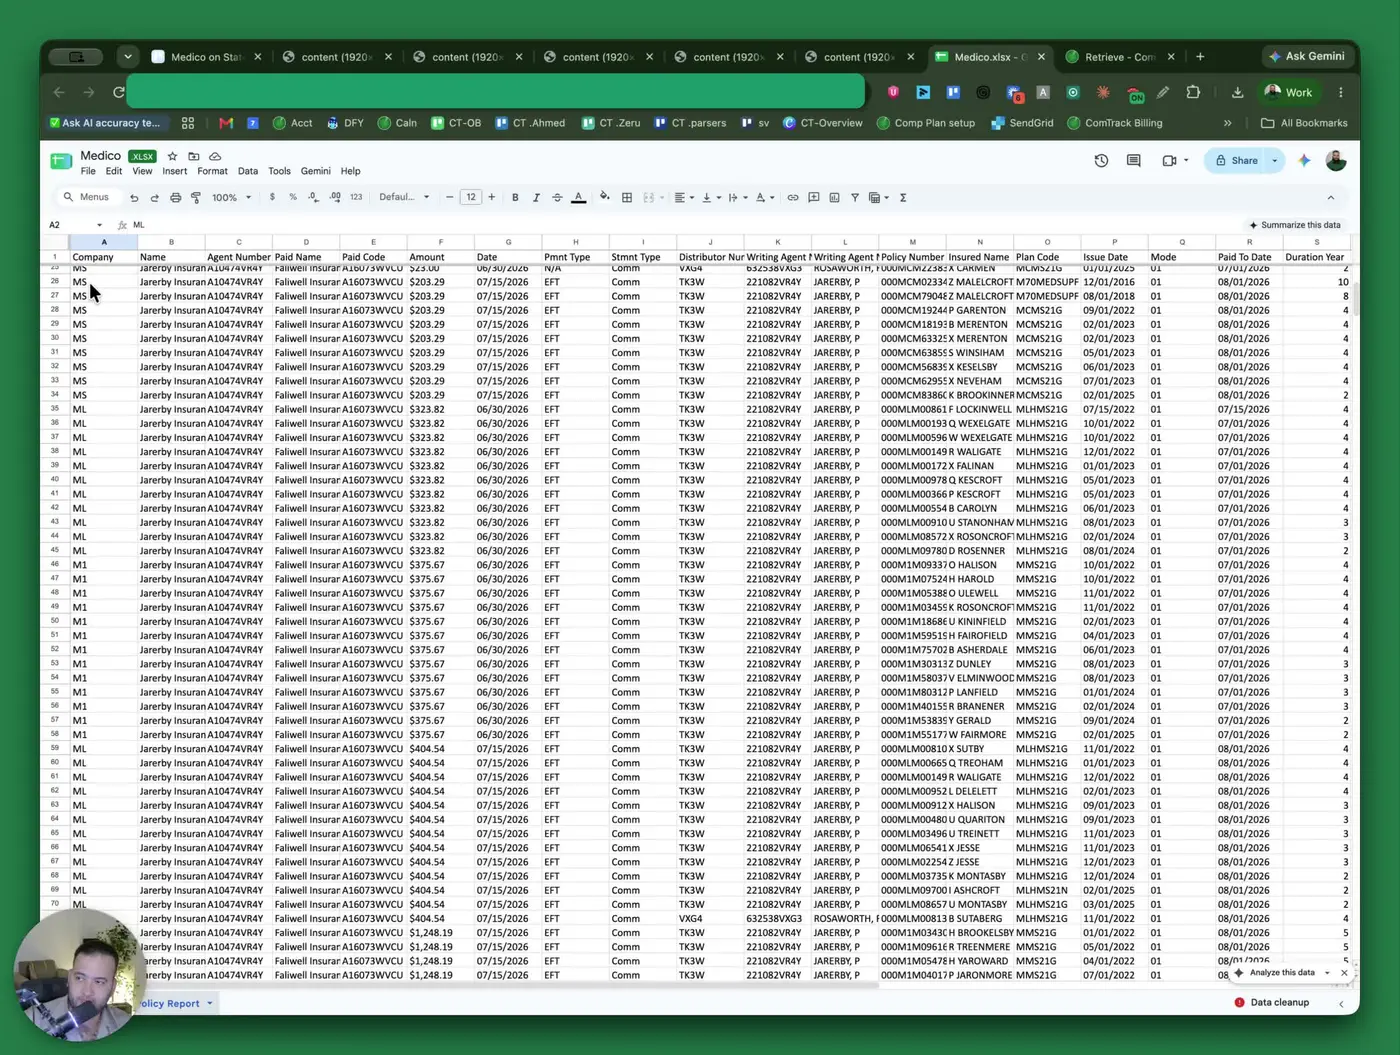
- Company code identifies the Medico division or entity.
- ML = Medico Life and Health Insurance
- MS = Medico Corp Life Insurance Company
- M1 = Medico Insurance Company / Medico main company
- Name = agency name the statement is issued to.
- Agent number = agency’s Medico ID.
- Paid name = party that received the payment.
- Paid code = paid party’s Medico ID.
- Amount = total payment for the batch.
- Date = payment date.
- Payment type = how payment was delivered (for example, EFT/direct deposit).
- Statement type = commission type (Comm = commission).
6. Review policy-level commission details 3:24
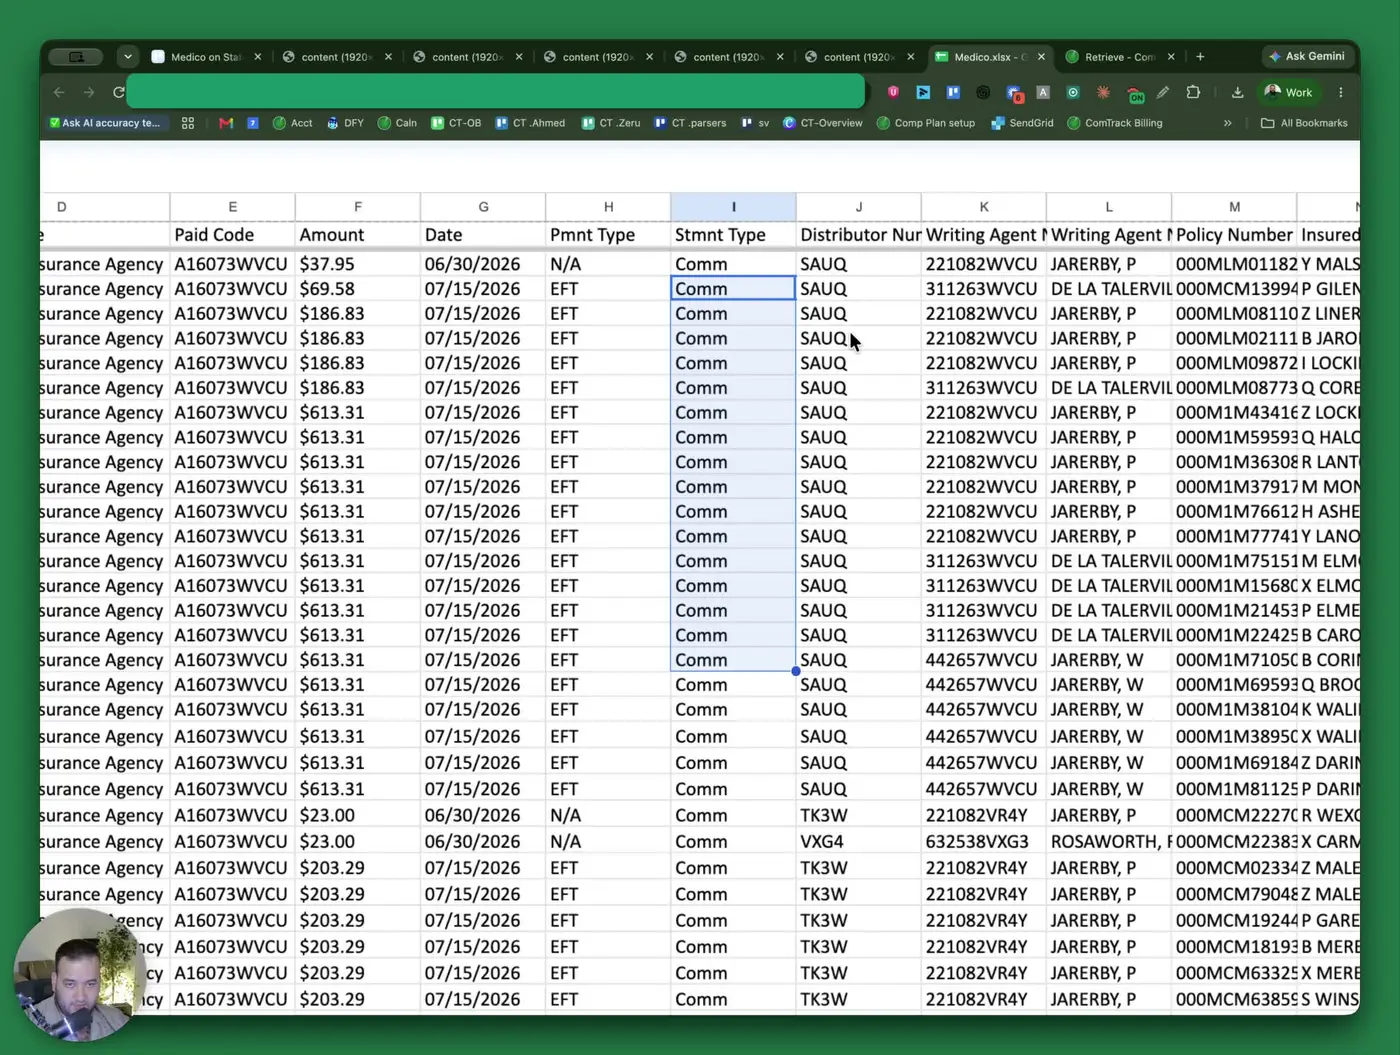
- Distributor number = upline agency code.
- Writing agent = agent who sold the policy.
- Policy number = client policy number.
- Insured name = client name.
- Plan code = product/plan identifier.
- Issue date = date the policy became effective.
- Mode = payment frequency (for example, 1 = monthly).
- Pay to date = date through which the client has paid premiums.
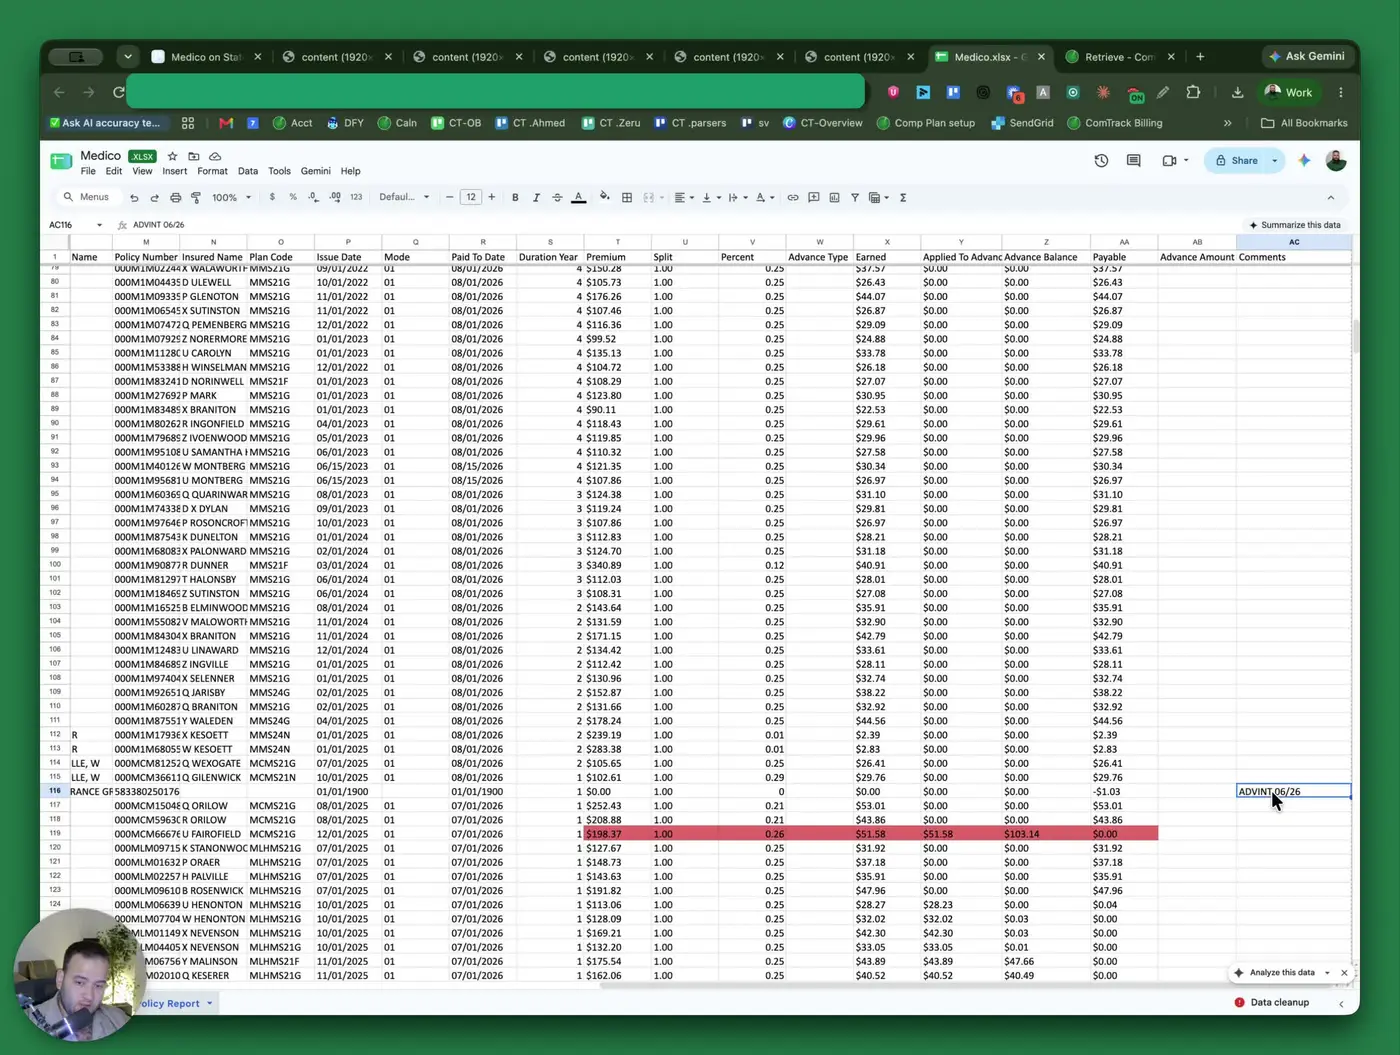
- Duration year = policy year (1 = first year / advance commission period).
7. Understand premium, split, and commission calculations 4:38
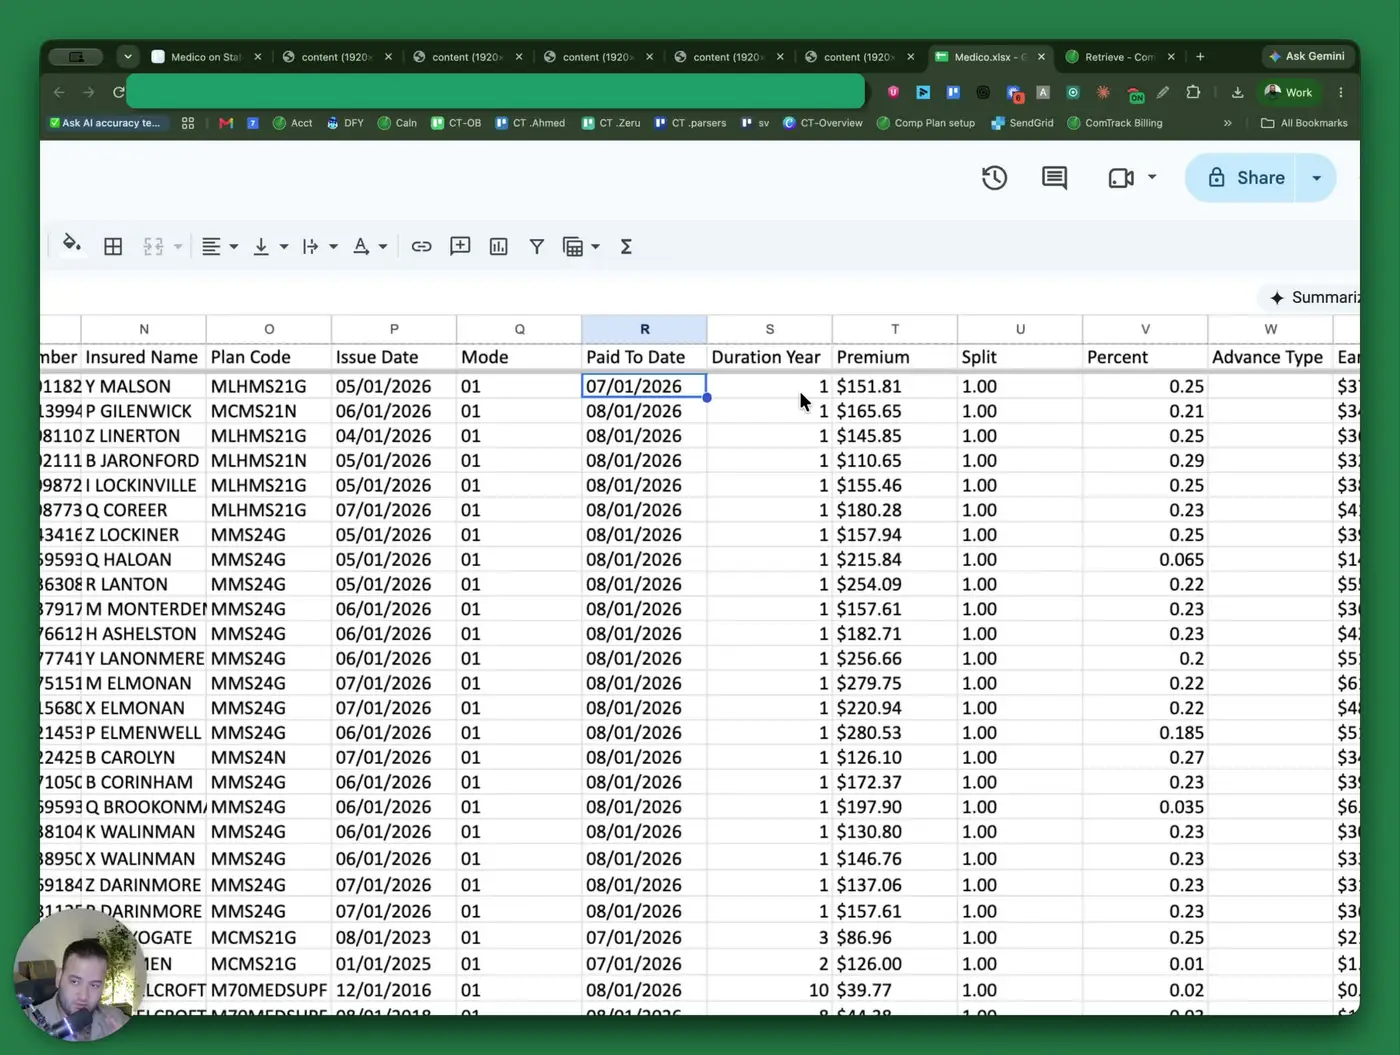
- Premium = amount the client paid.
- Split = agent share of the commission.
- 1 means 100% / no split.
- Percent = commission rate applied to the premium.
- Earned = commission amount calculated from premium × percent.
- Applied to advance = portion of earned commission used to repay an advance.
- Advance balance = remaining advance still owed on the policy.
- Payable = amount the agent is actually paid after advance offsets.
- Use the statement values to confirm whether the commission is fully payable or reduced by advance recovery.
8. Check comments and special adjustments 6:32
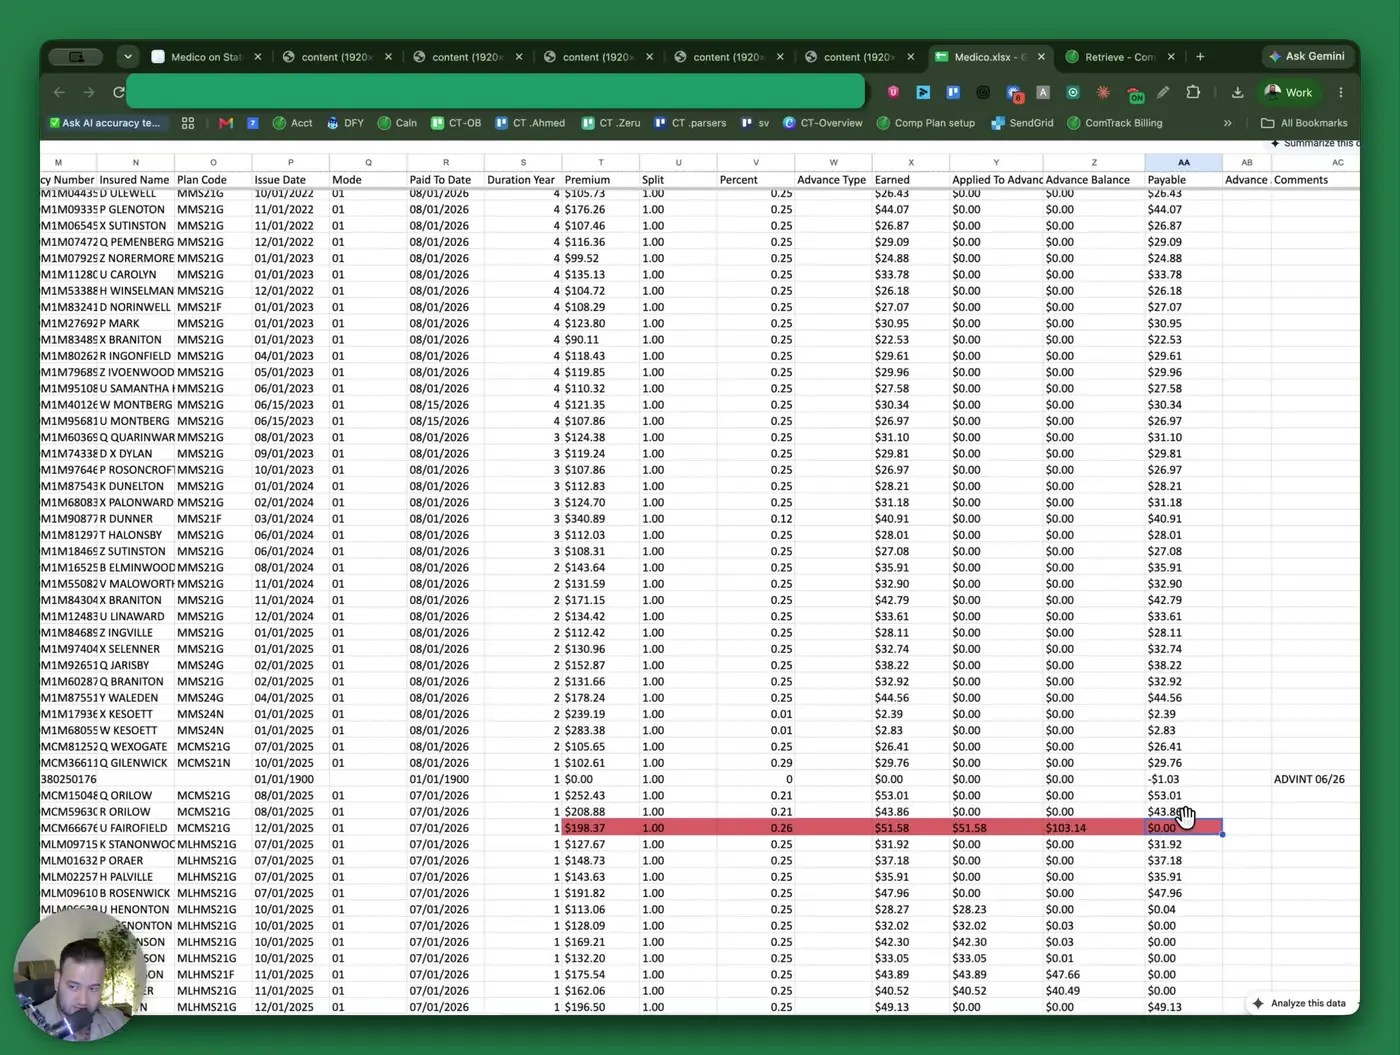
- Review the Comments column for notes from the carrier.
- Use comments to understand unusual entries, such as:
- advance interest
- negative adjustments
- other clarifications tied to the commission line
- Verify comments before assuming a discrepancy is an error.
9. Use ComTrack’s Retrieve feature to automate statement collection 7:06
- Open Retrieve inside ComTrack to avoid downloading statements manually.
- Enter the usernames and passwords for the carriers you want to pull from.
- Click Run.
- Choose how far back to retrieve data:
- 30 days
- 60 days
- 90 days
- Custom date range
- If using custom, enter a From date and To date.
10. Start retrieval and review the imported commissions 7:58
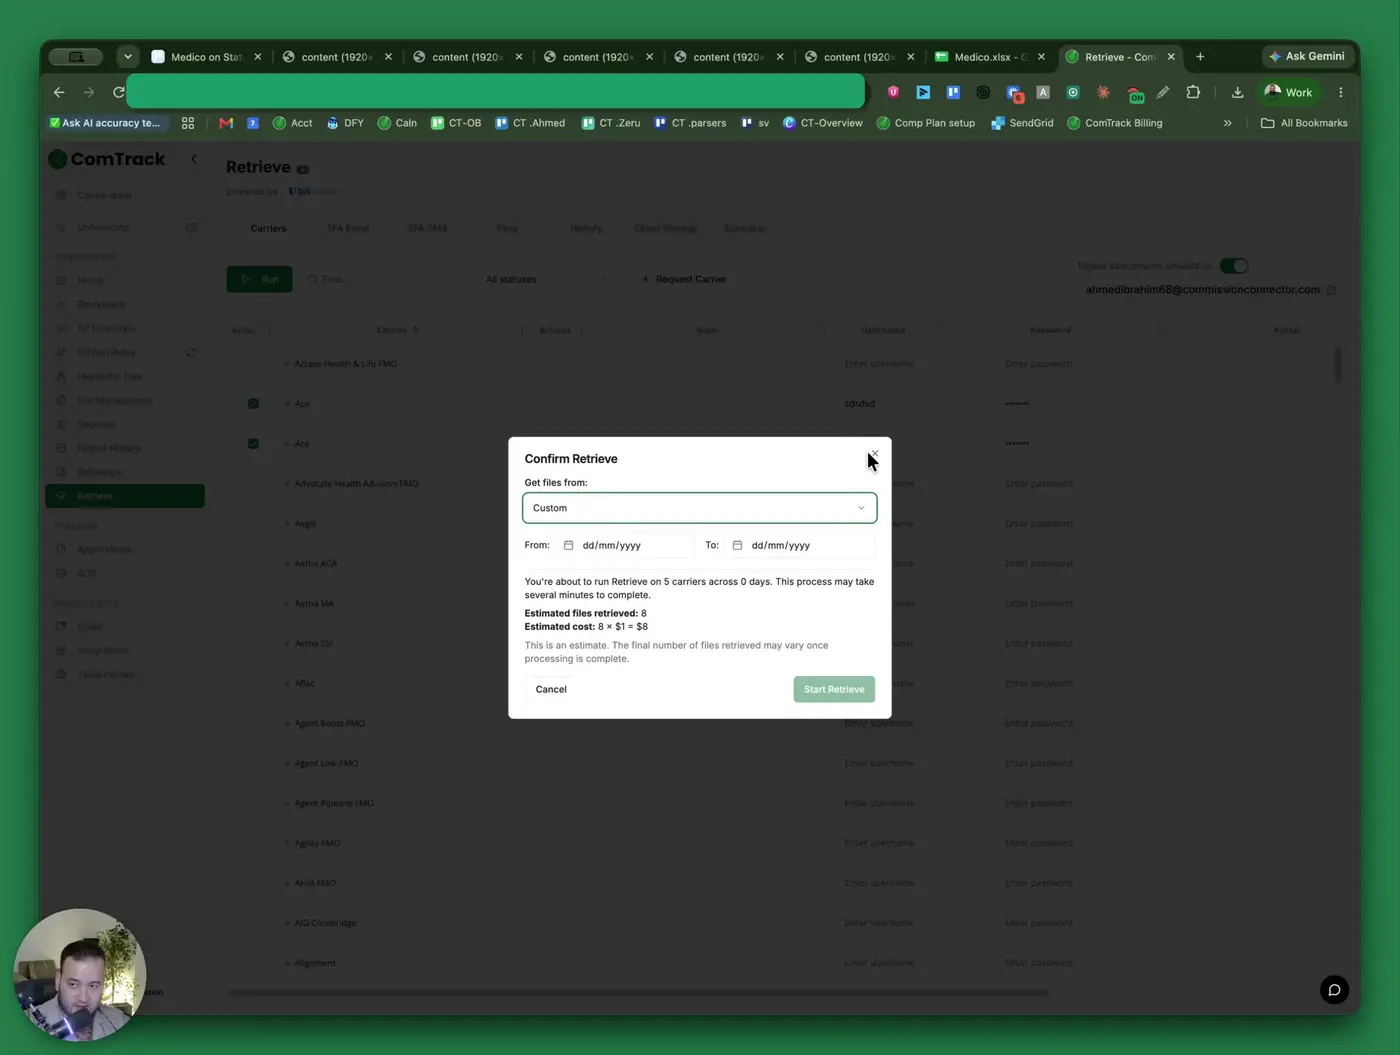
- Click Start Retrieve to begin the automated pull.
- Wait for the system to collect the commission statements.
- Once complete, review the commissions inside ComTrack.
- Use Dashboard or All Time Data to manage and analyze the imported records.
Cautionary Notes
- Ensure 2FA is completed before attempting to access commission statements.
- Double-check the date range before downloading to avoid missing or extra records.
- Confirm whether the statement is for the correct agency, paid party, and company code before using it for reporting.
- Be careful when interpreting advance balance and payable; a high advance balance can reduce or eliminate current payment.
- Review comments for special adjustments so they are not mistaken for errors.
- When using Retrieve, make sure carrier credentials are accurate and authorized.
Tips for Efficiency
- Use the Excel download format when you need to sort, filter, or upload data into ComTrack.
- Prefer the Retrieve feature for recurring statement pulls to save time and reduce manual work.
- Use custom date ranges only when a standard 30/60/90-day pull is not sufficient.
- Keep a reference list of company codes, plan codes, and common commission terms for faster review.
- After retrieval, use ComTrack’s dashboard views to quickly spot trends, missing payments, or advance offsets.