
Objective
This SOP explains how to manually download a commission statement from the Symetra portal and how to interpret the key fields on the statement. It also outlines how to use ComTrack Retrieve to automate statement downloads on a recurring schedule.
Key Steps
1. Log in to Symetra and open the Commissions section 0:07
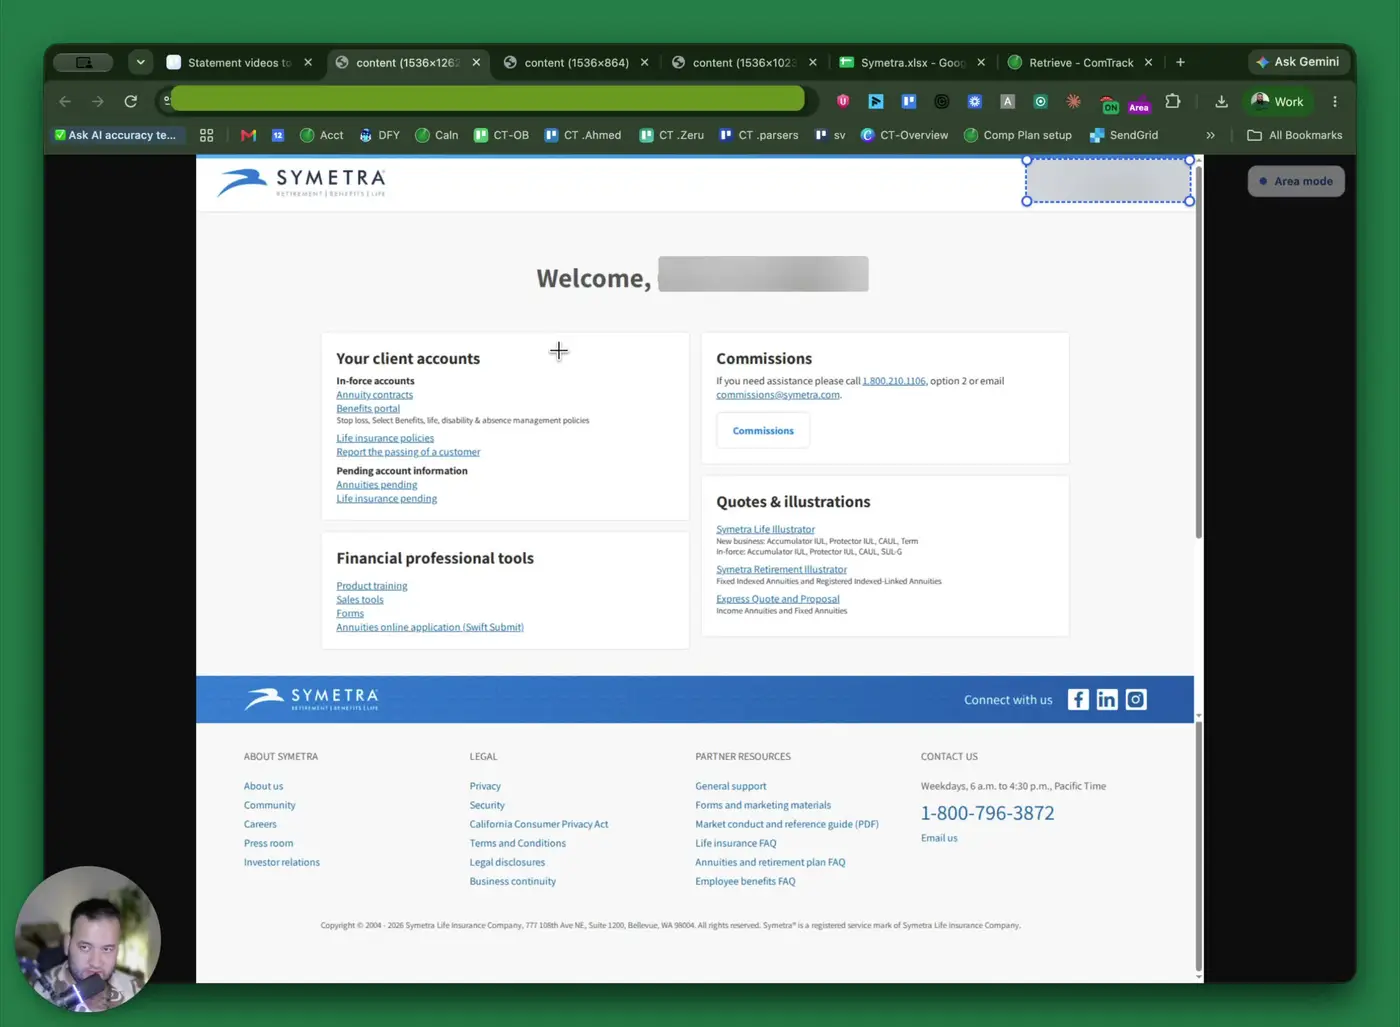
- Log in to the Symetra portal.
- Complete 2FA authentication using the required code.
- Click Commissions to open the commissions page.
- Confirm you are on the page that lists available commission options.
2. Select the correct commission type 0:17
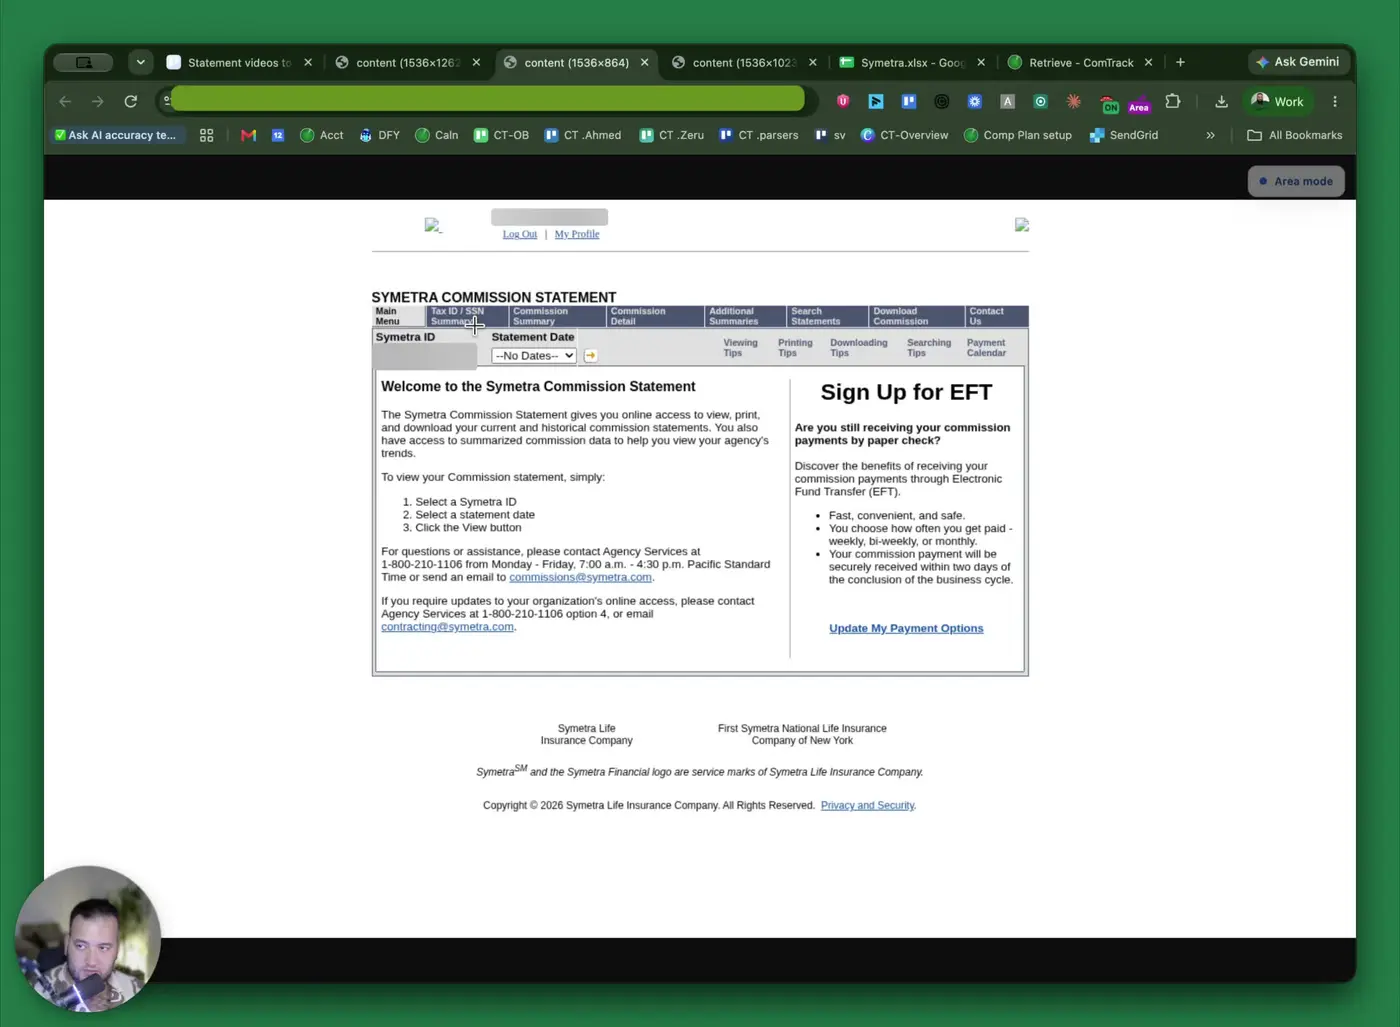
- When prompted, choose the commission type you need.
- Select Commission Detail for the most complete view.
- Use this option when you need commission-level details such as:
- Agent information
- IDs
- Client details
- Other transaction-specific data
3. Choose the statement date 0:28
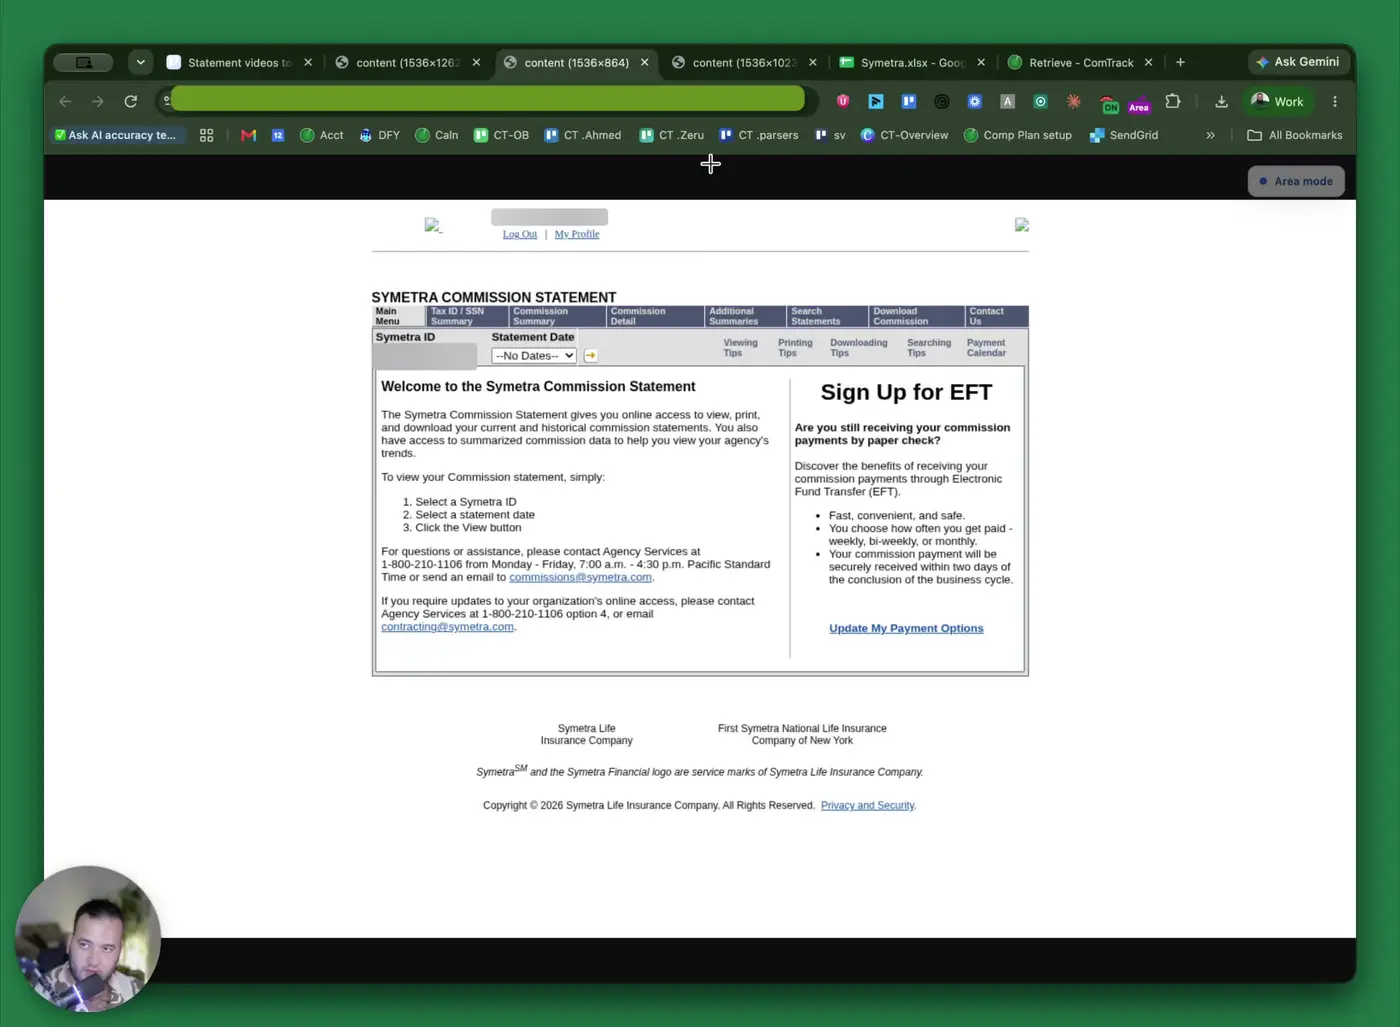
- On the statement date page, select the date you want the statement for.
- Use the drop-down menu to choose the correct date.
- Verify the selected date before continuing, since this determines which statement is downloaded.
4. Download the statement file 0:43
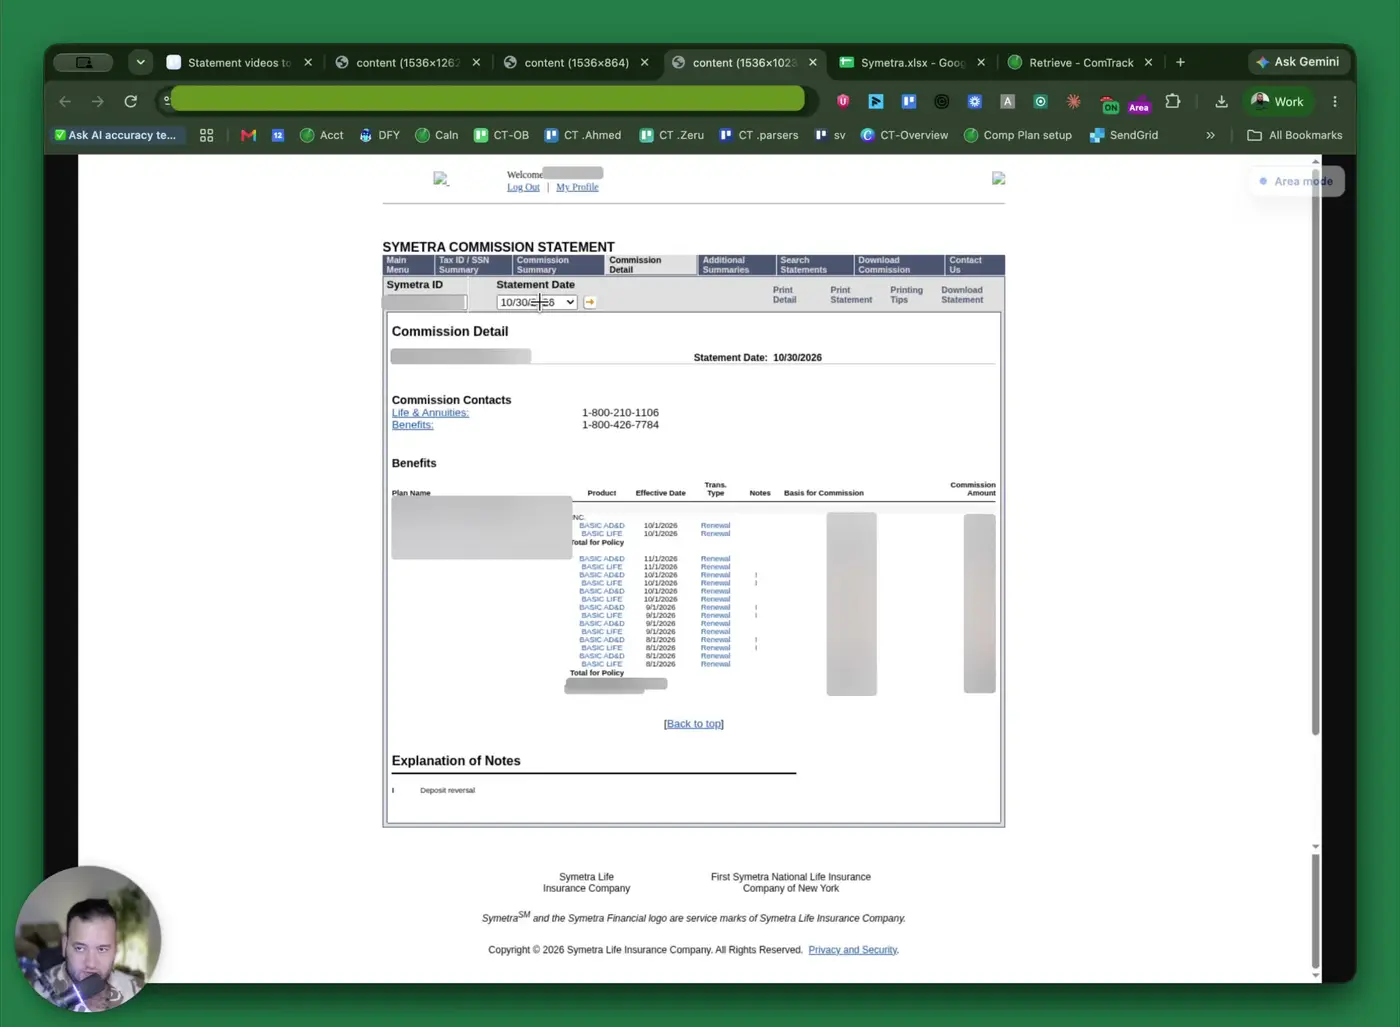
- Click Download Statement on the far right side of the page.
- Wait for the file to finish downloading.
- Save the file to your computer in the appropriate folder for later review or recordkeeping.
5. Review the main fields on the Symetra statement 0:58
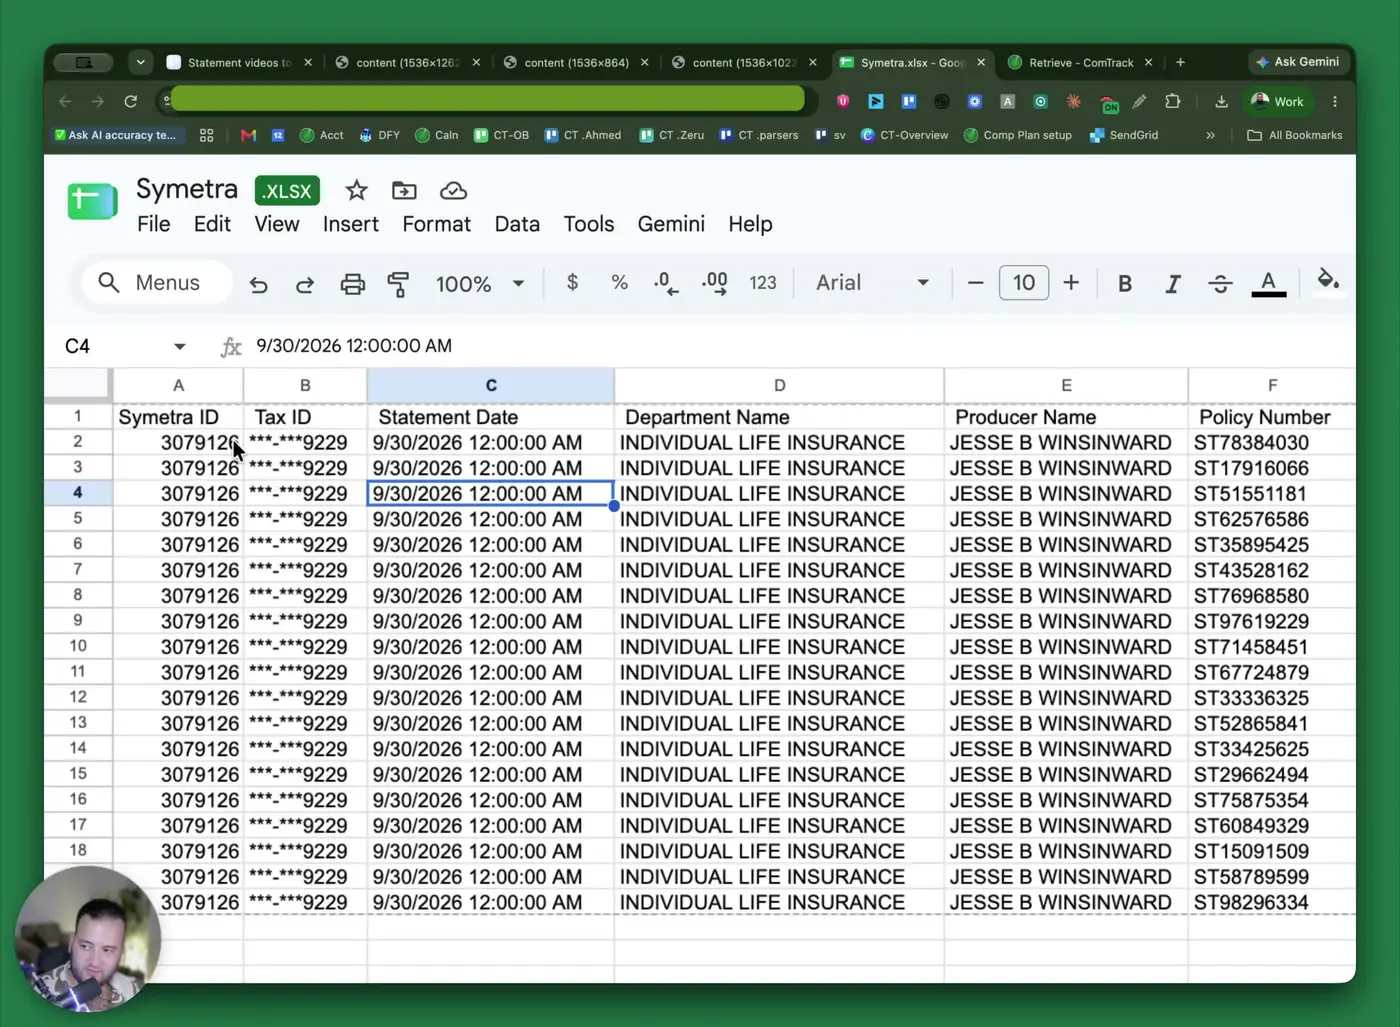
- Identify the key columns and what they mean:
- Symetra ID: Agent ID in Symetra
- Tax ID: Masked tax ID, showing only the last four digits
- Statement Date: The date selected during download
- Department Name: Type of business or policy category
- Producer Name: Agent name
- Policy Number: Policy identifier
- Policy Tax ID: Tax ID for a business-owned policy
6. Interpret policy, client, and product details 1:35
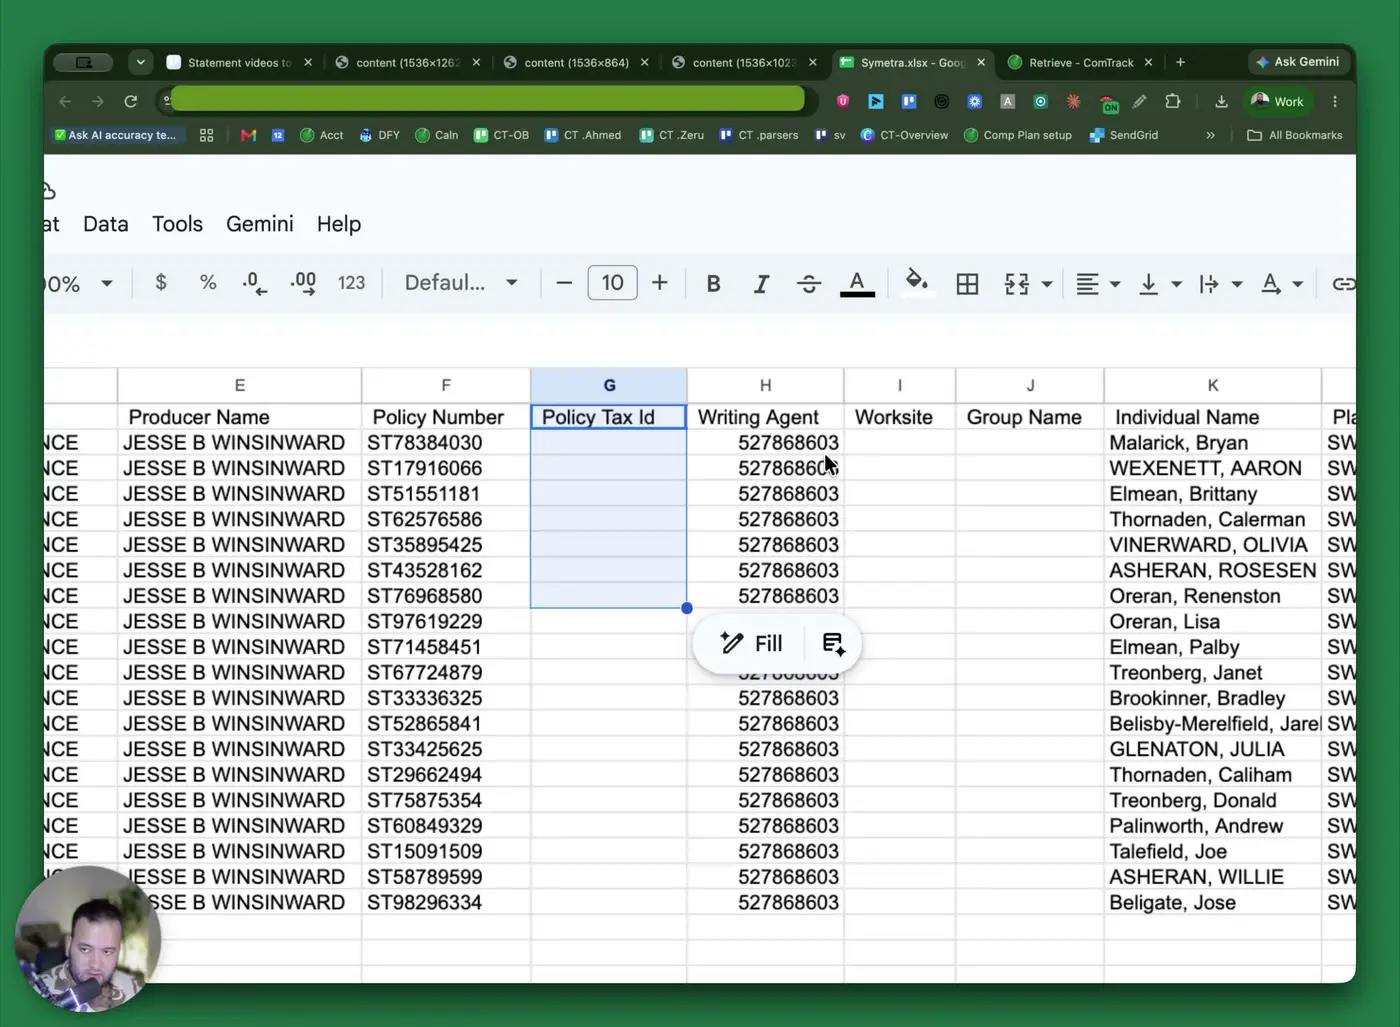
- Review the fields that identify who the policy belongs to and what product it is:
- Writing Agent: Selling agent number
- Worksite: Used for employer/worksite plans
- Group Name: Policyholder name for group policies
- Individual Name: Client name for individual policies
- Plan Name: Product name (for example, Swift Term 20)
7. Understand transaction and commission fields 2:08
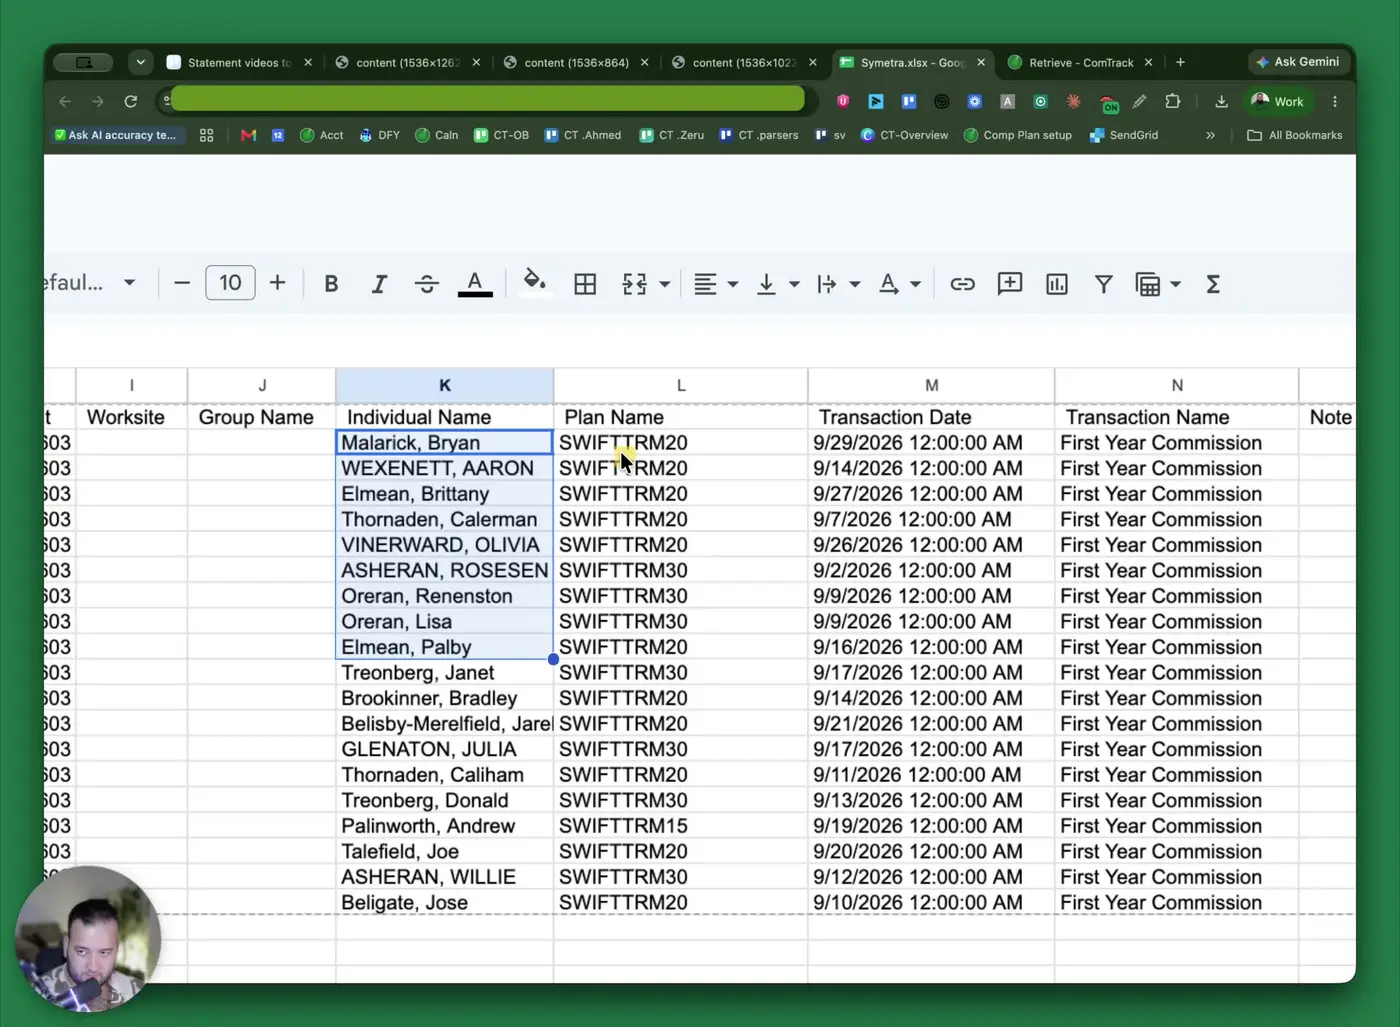
- Use the transaction columns to understand how the commission was generated:
- Transaction Date: Date the client payment was received
- Transaction Name: Type of payment or commission event, such as first-year commission or advance
- Note Description 1/2/3: Additional comments related to the payment
- Basis for Commission: Premium amount used to calculate commission
- Commission PCT: Commission rate
- Commission Amount: Amount paid on that row, calculated as commission rate × basis
8. Review payment status and internal coding 3:15
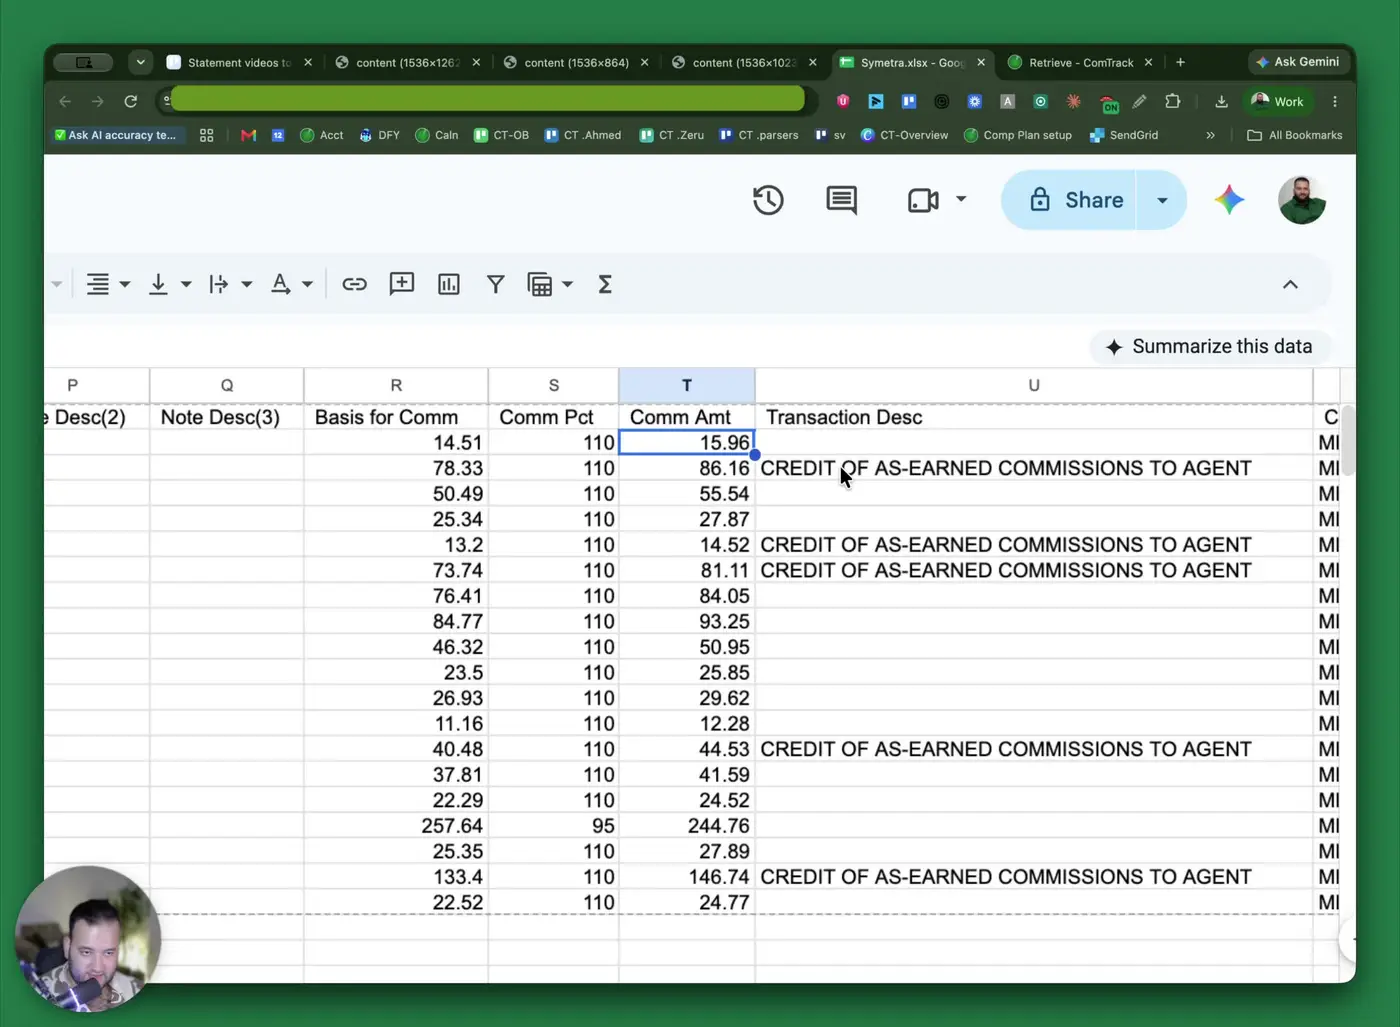
- Check the remaining fields for payment status and internal tracking:
- Transaction Description: Notes on how the commission was paid
- As Earned: Indicates payment is earned month by month rather than as an advance
- Commission Code: Internal Symetra commission schedule code
- Issue State: State where the policy was sold
- Policy Duration: Policy year (for example, 1 = first year)
- Qualification Code: Used for retirement-type policies; may be blank
- Commission Indicator: Status indicator such as PD meaning paid
9. Use ComTrack Retrieve to automate statement downloads 4:07
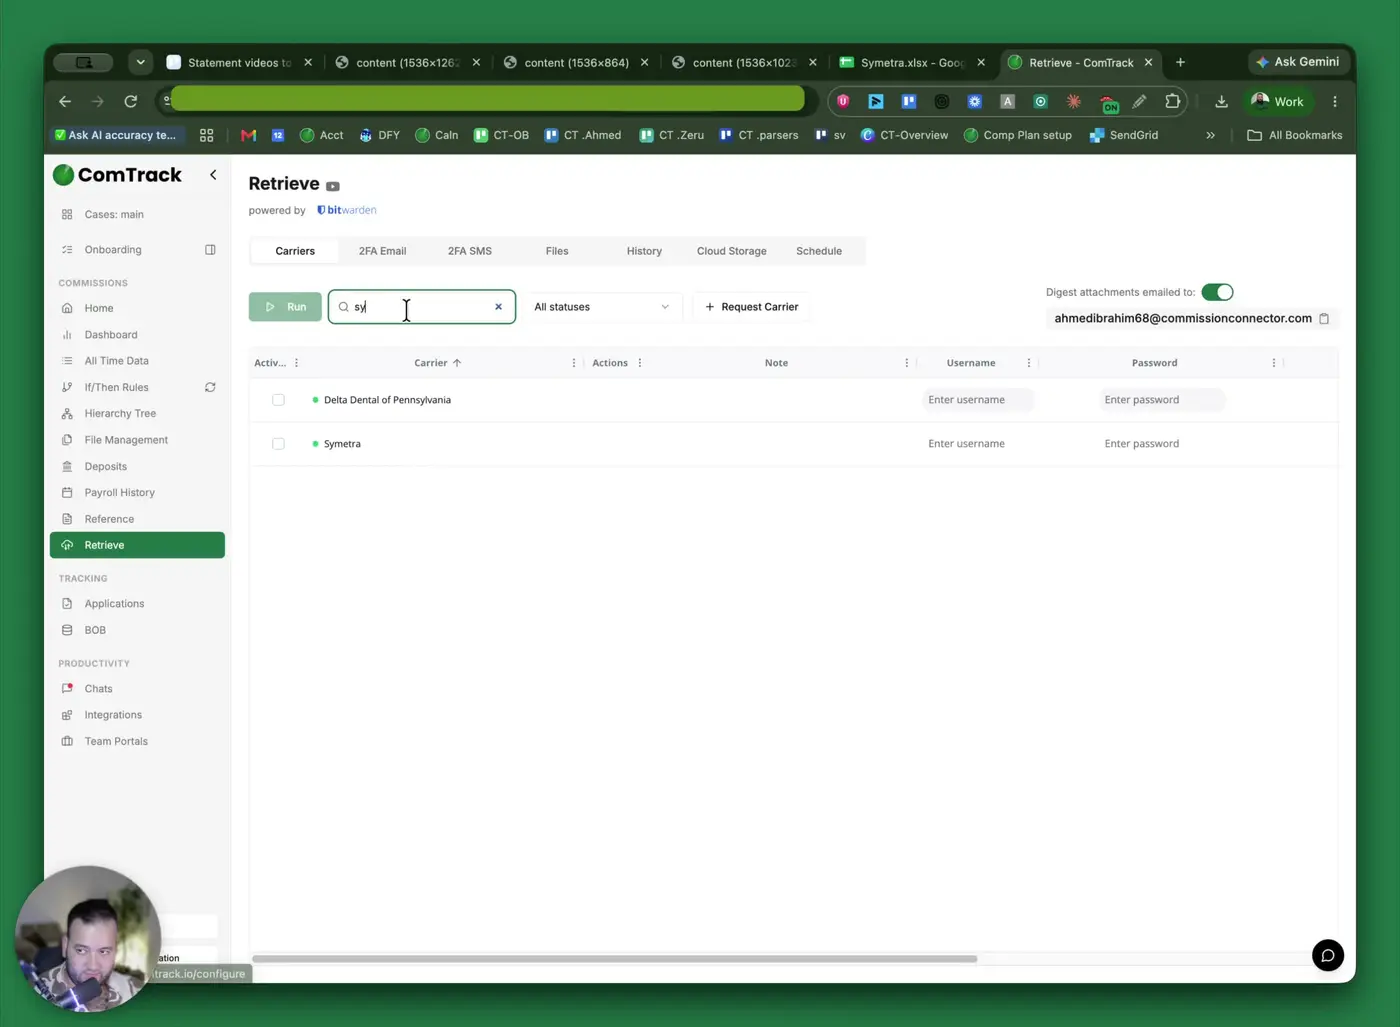
- Open ComTrack and go to the Retrieve feature.
- Search for Symetra in the list of available carriers/portals.
- Enter the Symetra username and password.
- Click Run to pull statements manually for a selected time range.
10. Set a time range or schedule recurring retrievals 4:55
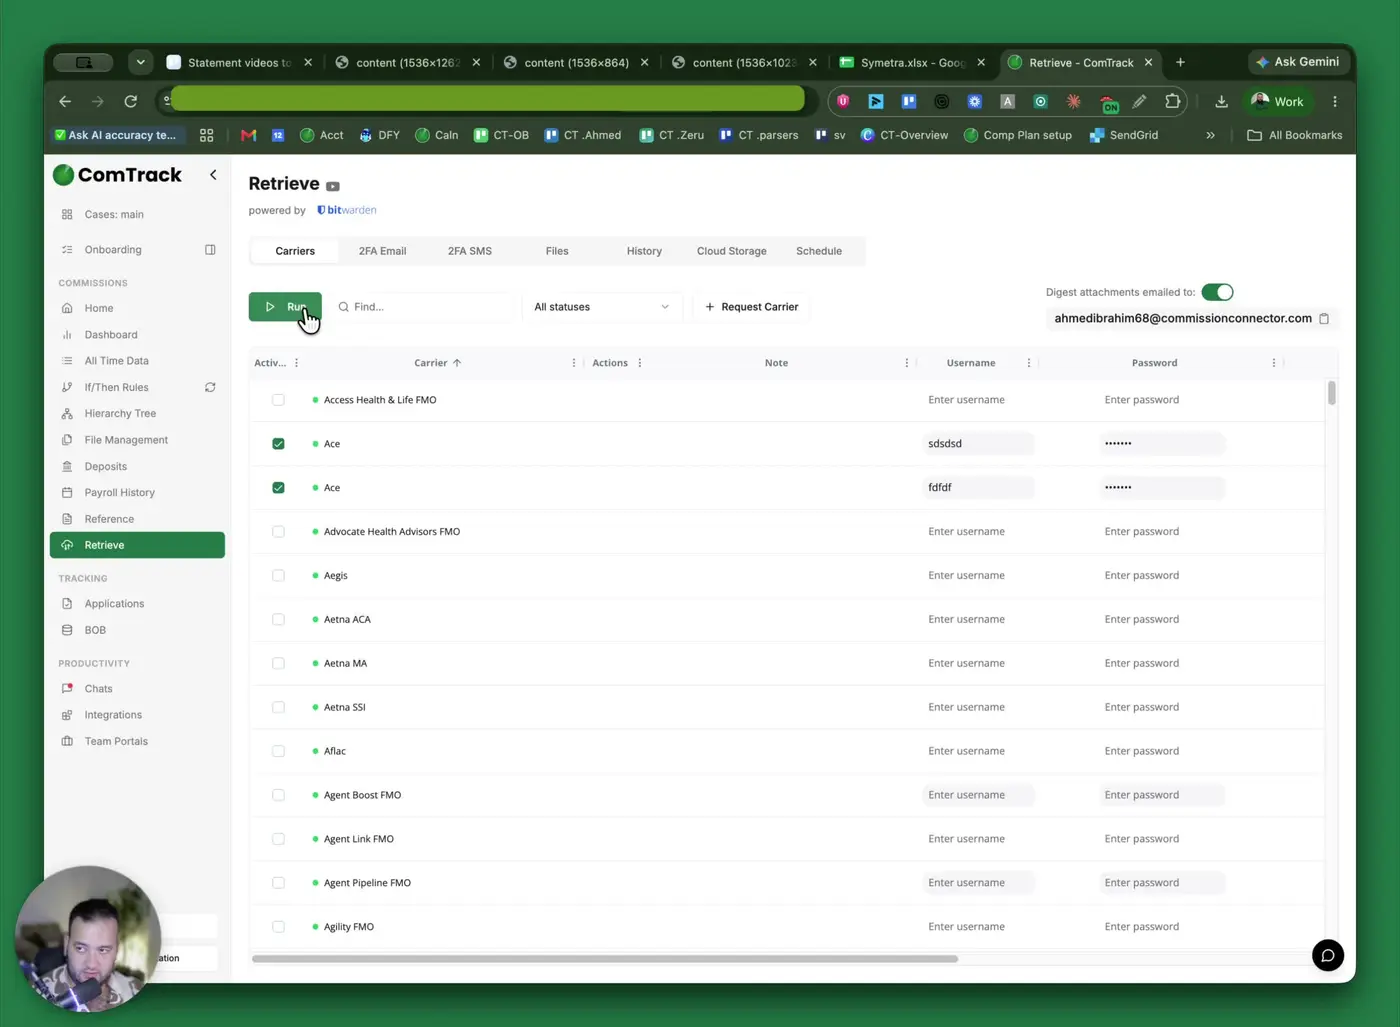
- When running Retrieve, choose how far back to pull data:
- 30 days
- 60 days
- 90 days
- Custom range
- To automate the process, click Schedule.
- Set the time trigger and choose the carrier(s) to include.
- Save the schedule so ComTrack can automatically retrieve files on the selected cadence.
Cautionary Notes
- Ensure you are logged in with the correct Symetra account before downloading statements.
- Double-check the statement date before downloading to avoid pulling the wrong period.
- Keep Symetra credentials secure when entering them into ComTrack Retrieve.
- Verify that the downloaded file is saved successfully before closing the browser or portal.
- If a field is blank on the statement, confirm whether it is expected for that policy type (for example, qualification code may be empty).
Tips for Efficiency
- Use Commission Detail when you need the most complete commission breakdown.
- Save downloaded statements in a consistent folder structure by month or carrier for easier retrieval.
- Use Retrieve in ComTrack to reduce manual downloads and save time.
- If you need recurring statements, set up a schedule instead of running one-time pulls each month.
- Review the commission amount by checking the commission rate and basis for commission to quickly validate calculations.