
Objective
This SOP explains how to access the Ameritas Portal, download commission statements, and interpret the key fields in the statement. It also includes an optional faster method for retrieving statements automatically through ComTrack Retrieve.
Key Steps
1. Log in to the Ameritas Portal and open Compensation 0:00
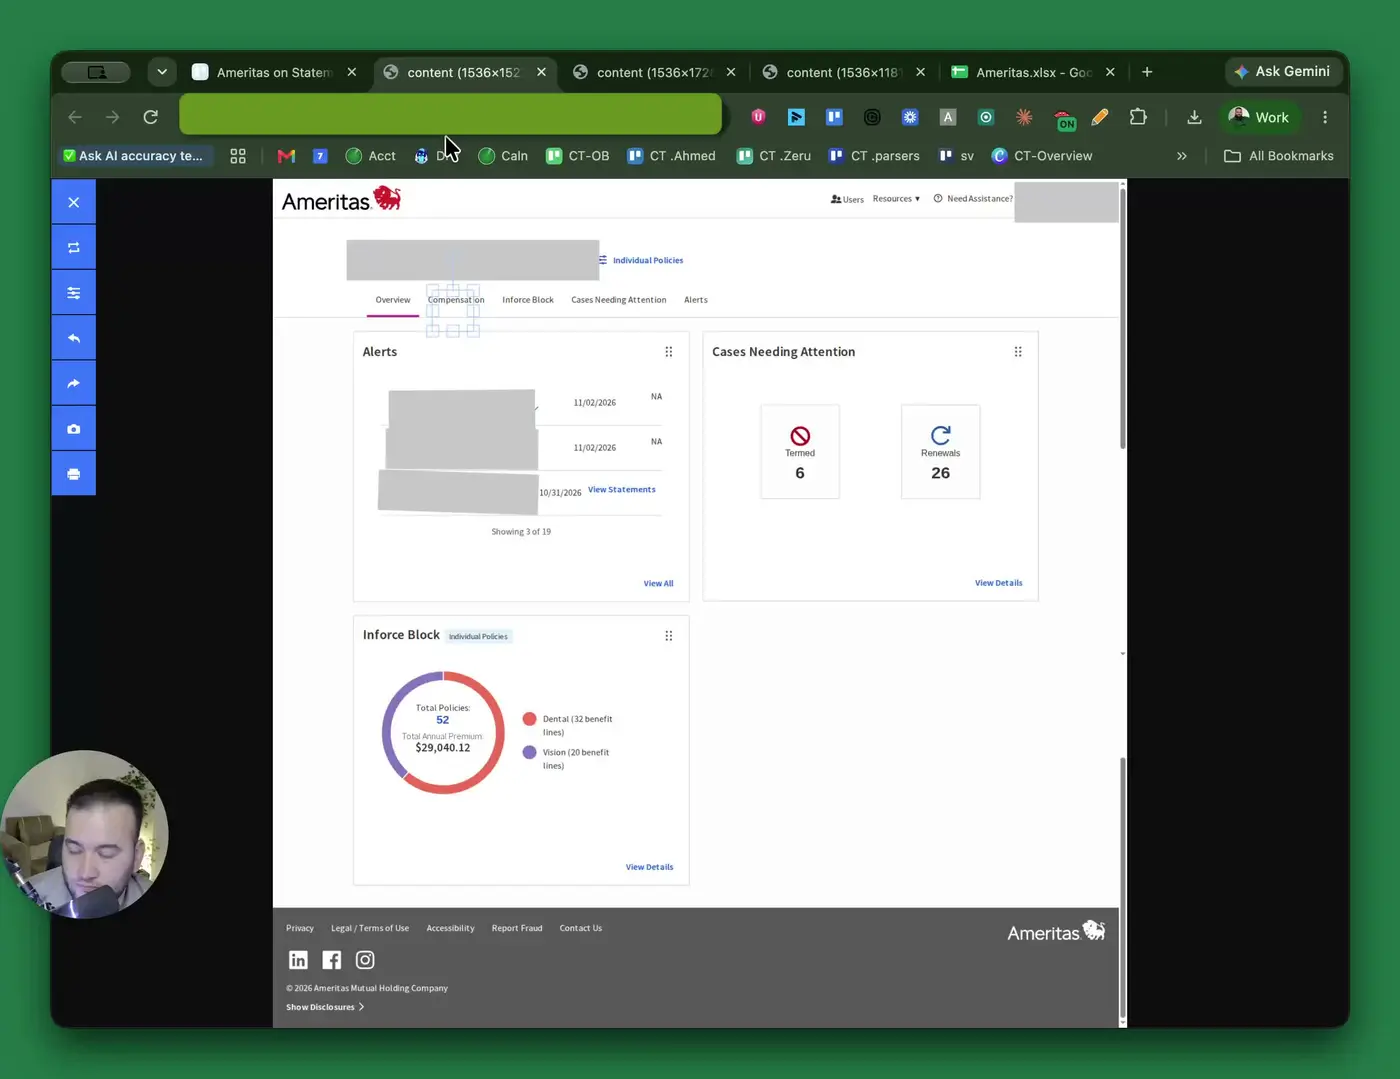
- Sign in to the Ameritas Portal using your username and password.
- Complete 2FA authentication when prompted.
- From the main menu, click Compensation to access statement-related reports.
2. Open the Reports section 0:18
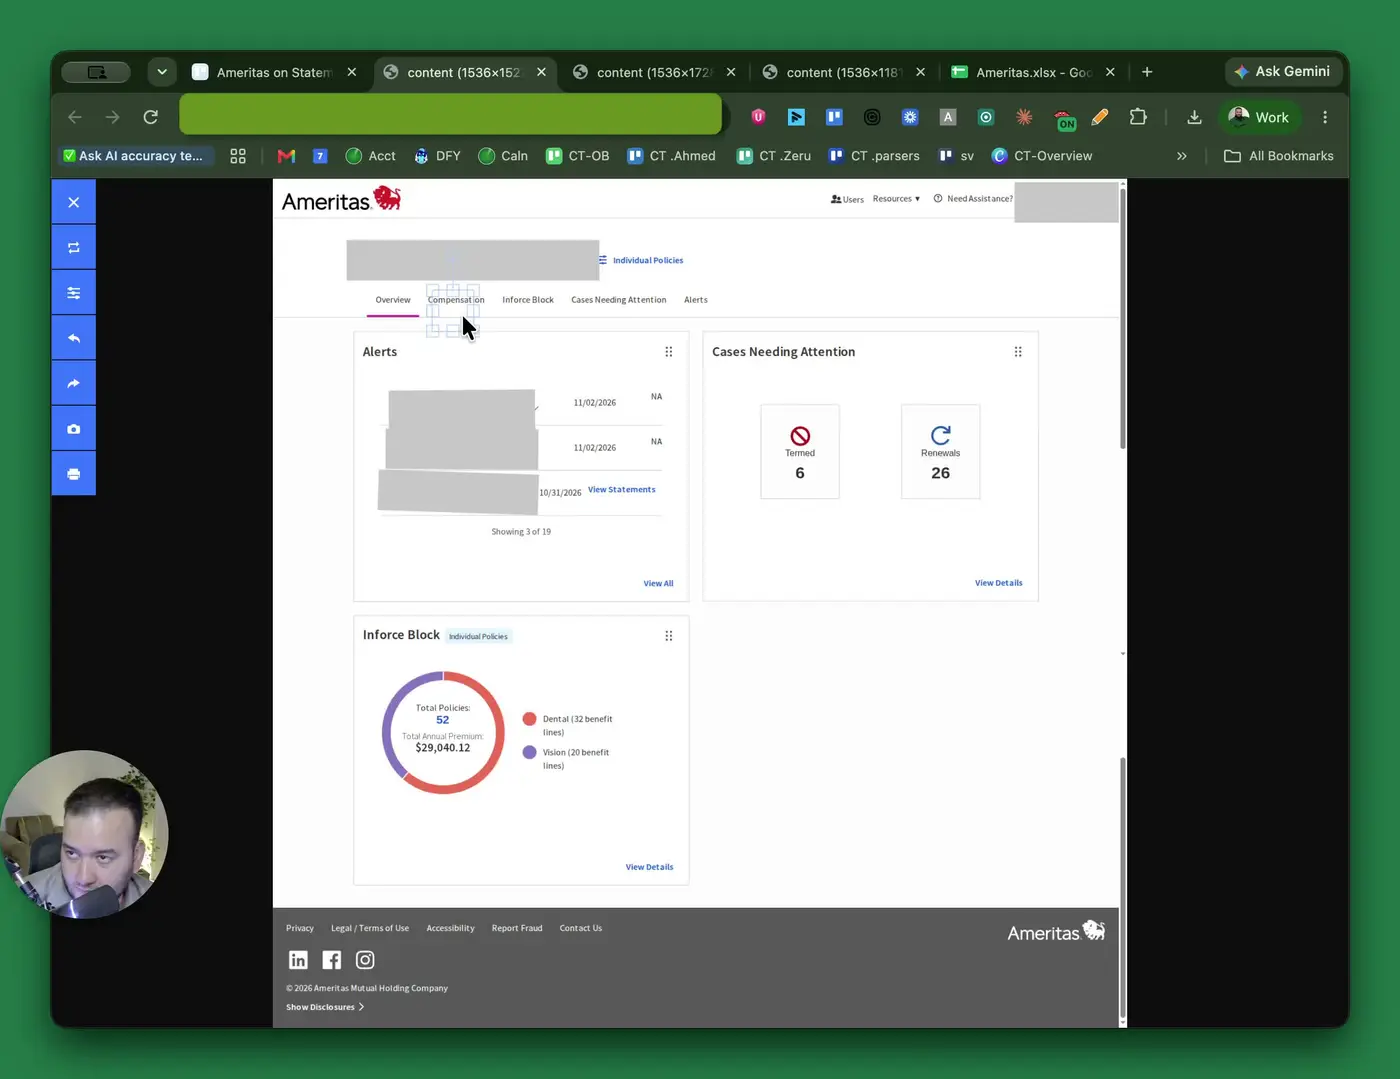
- On the Compensation page, locate the available report options.
- Click Report rather than the PDF area.
- This will take you to the statement report list needed for downloads.
3. Locate the statement files and adjust the date range if needed 0:28
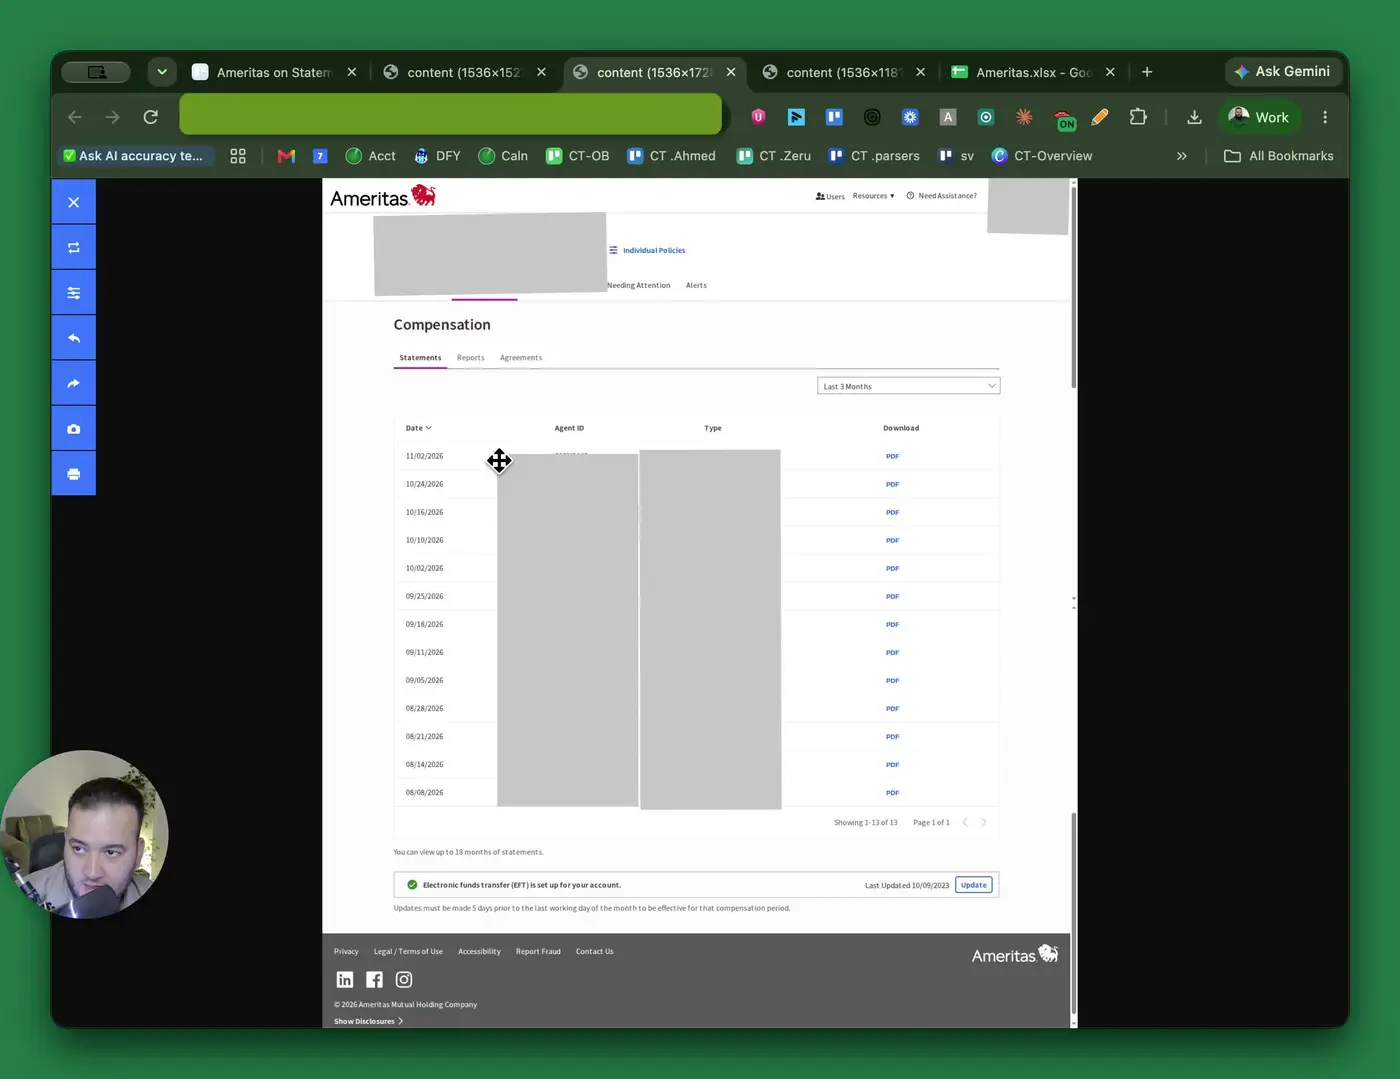
- Review the available statement files, which appear in Excel/XLS format.
- Confirm you are viewing the correct statement list for download.
- If needed, change the payment period to a different range such as:
- Last 3 months
- Last year
- Last 2 years
- Select the period that matches the statements you need.
4. Download the statements 0:48
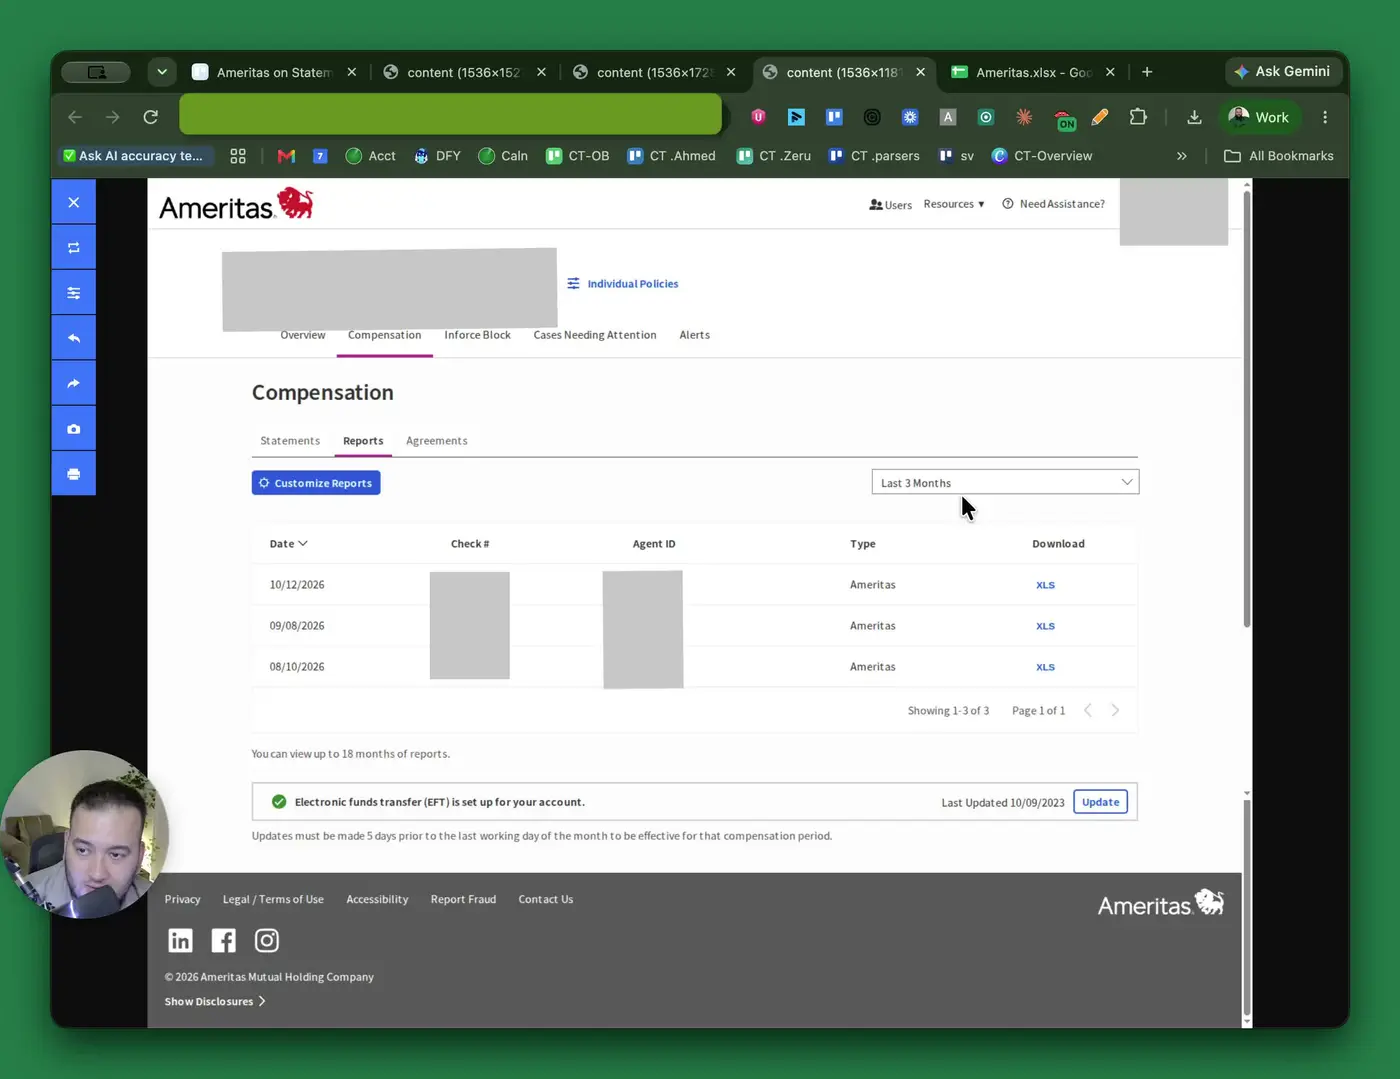
- Download the statement files one by one.
- Save each file in the appropriate folder or location for review and recordkeeping.
- Confirm each download completes successfully before moving to the next file.
5. Review the carrier and policy identification fields 0:58
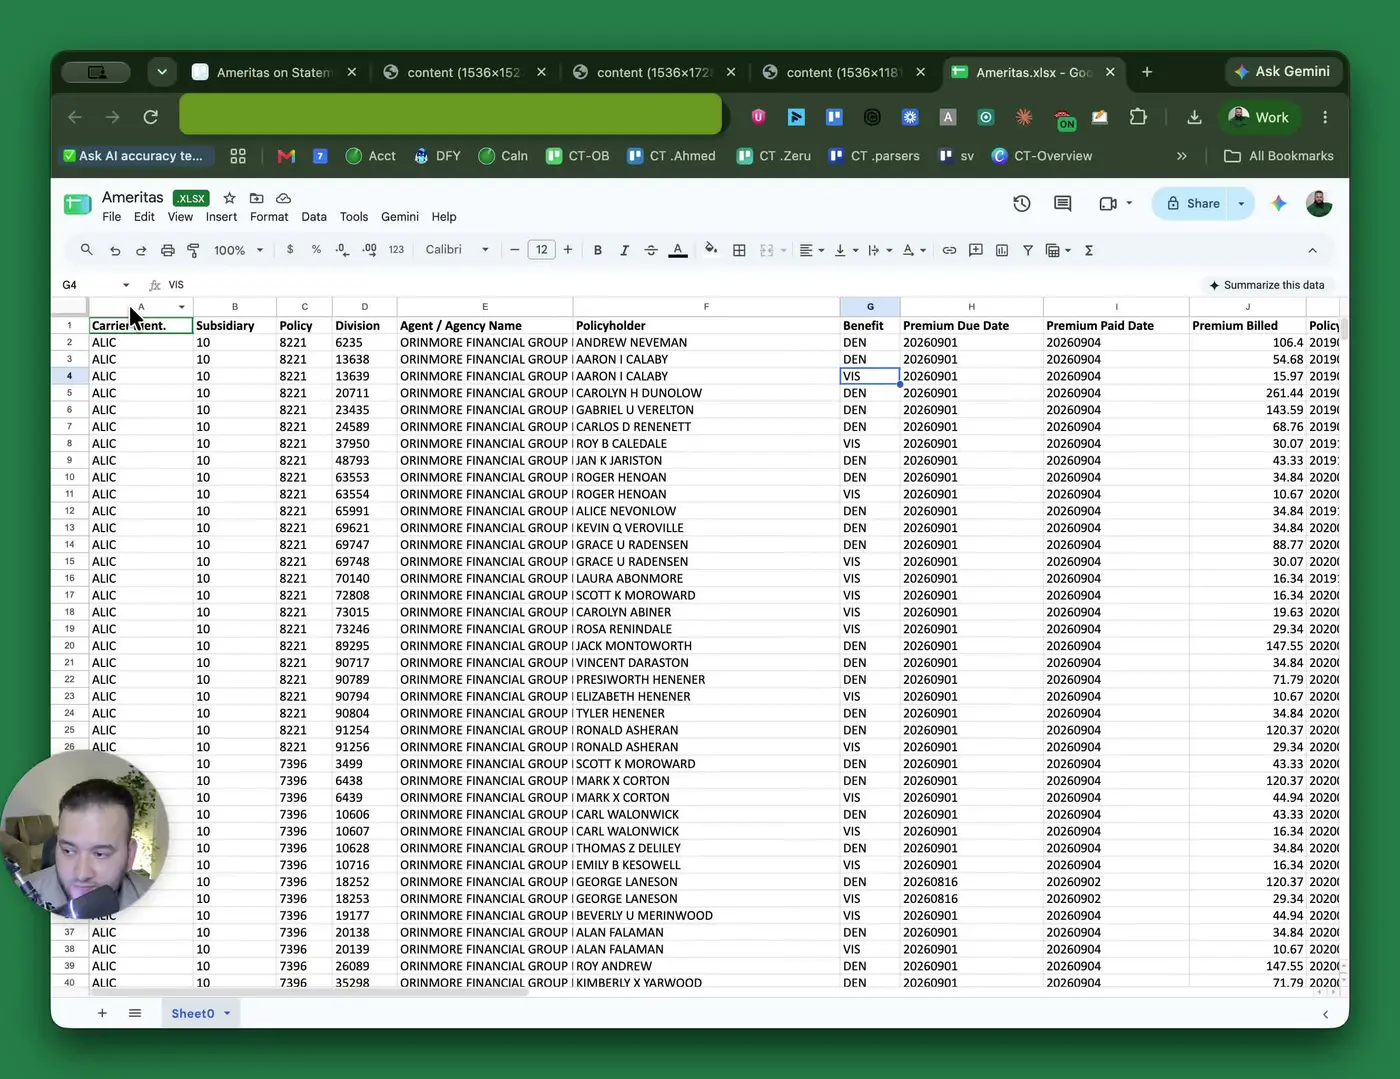
- Check the Carrier Identity column to confirm the carrier name/code.
- Verify the Subsidiary field if applicable; agents can usually skip this field.
- Review the Policy number, which identifies the client’s plan.
- Review the Division number, which identifies the client within the plan.
- Confirm the Agent/Agency Name and Policy Holder name for accuracy.
6. Interpret benefit, payment, and effective date fields 1:55
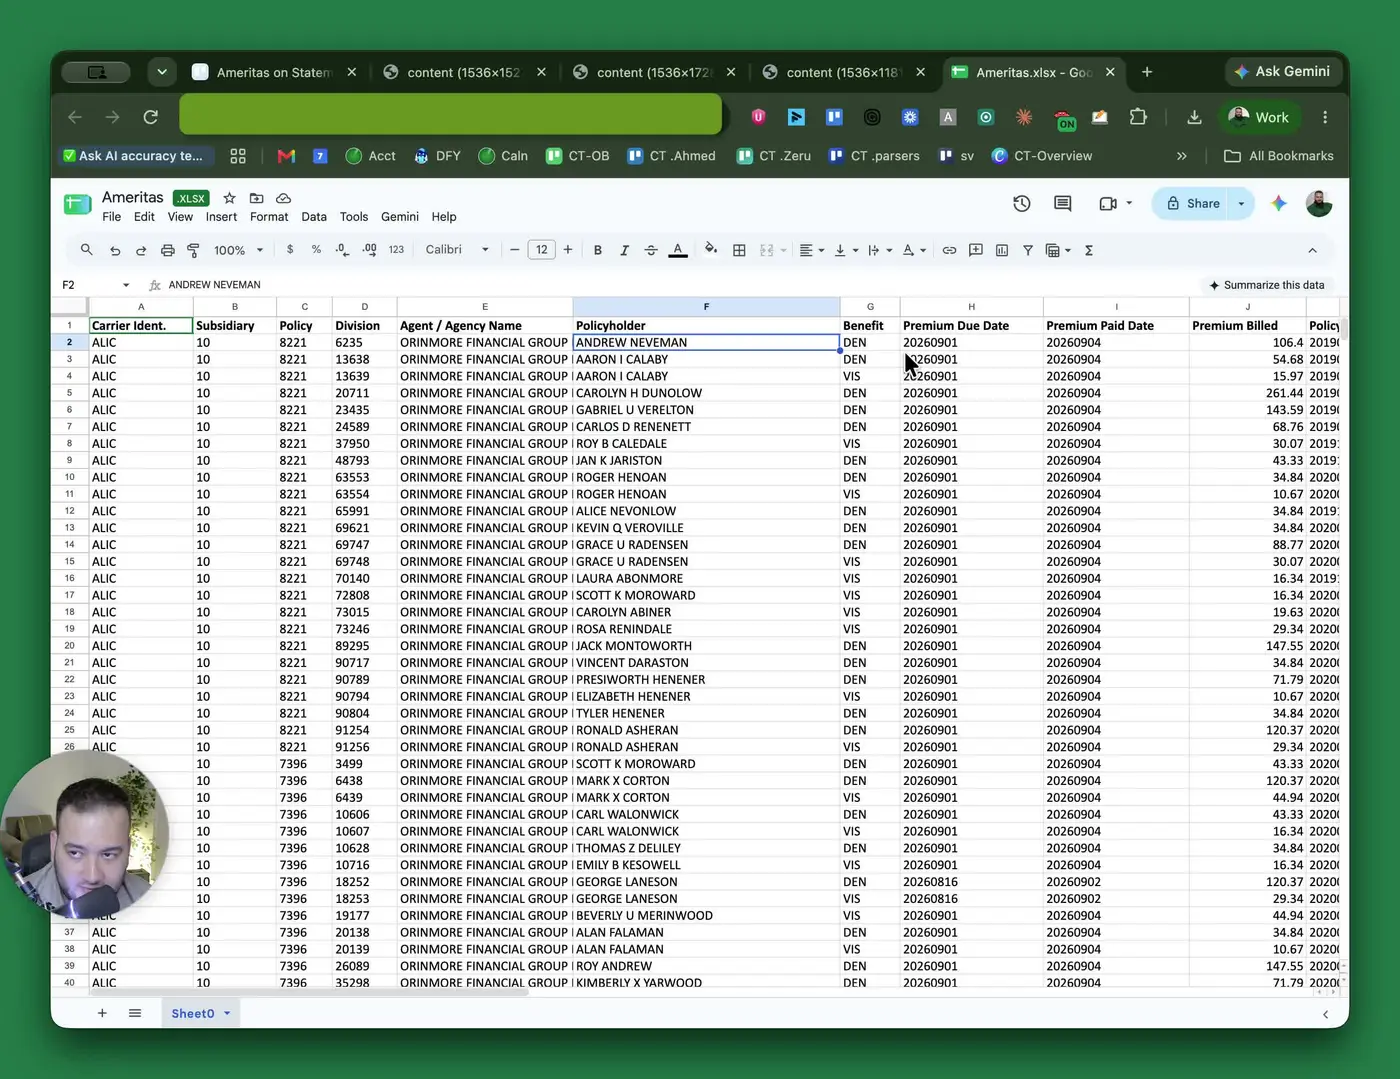
- Review the Benefit field to identify the product type.
- Common examples include:
- DEN = Dental
- VIS = Vision
- HRG = Hearing
- LSK = LASIK
- Check the Premium Due Date to see when payment was due.
- Check the Premium Pay Date to see when the client actually paid.
- Review the Premium Billed amount to confirm the premium collected.
- Confirm the Policy/Division Effective Date to identify when coverage began.
7. Verify agent, commission, and policy details 2:43
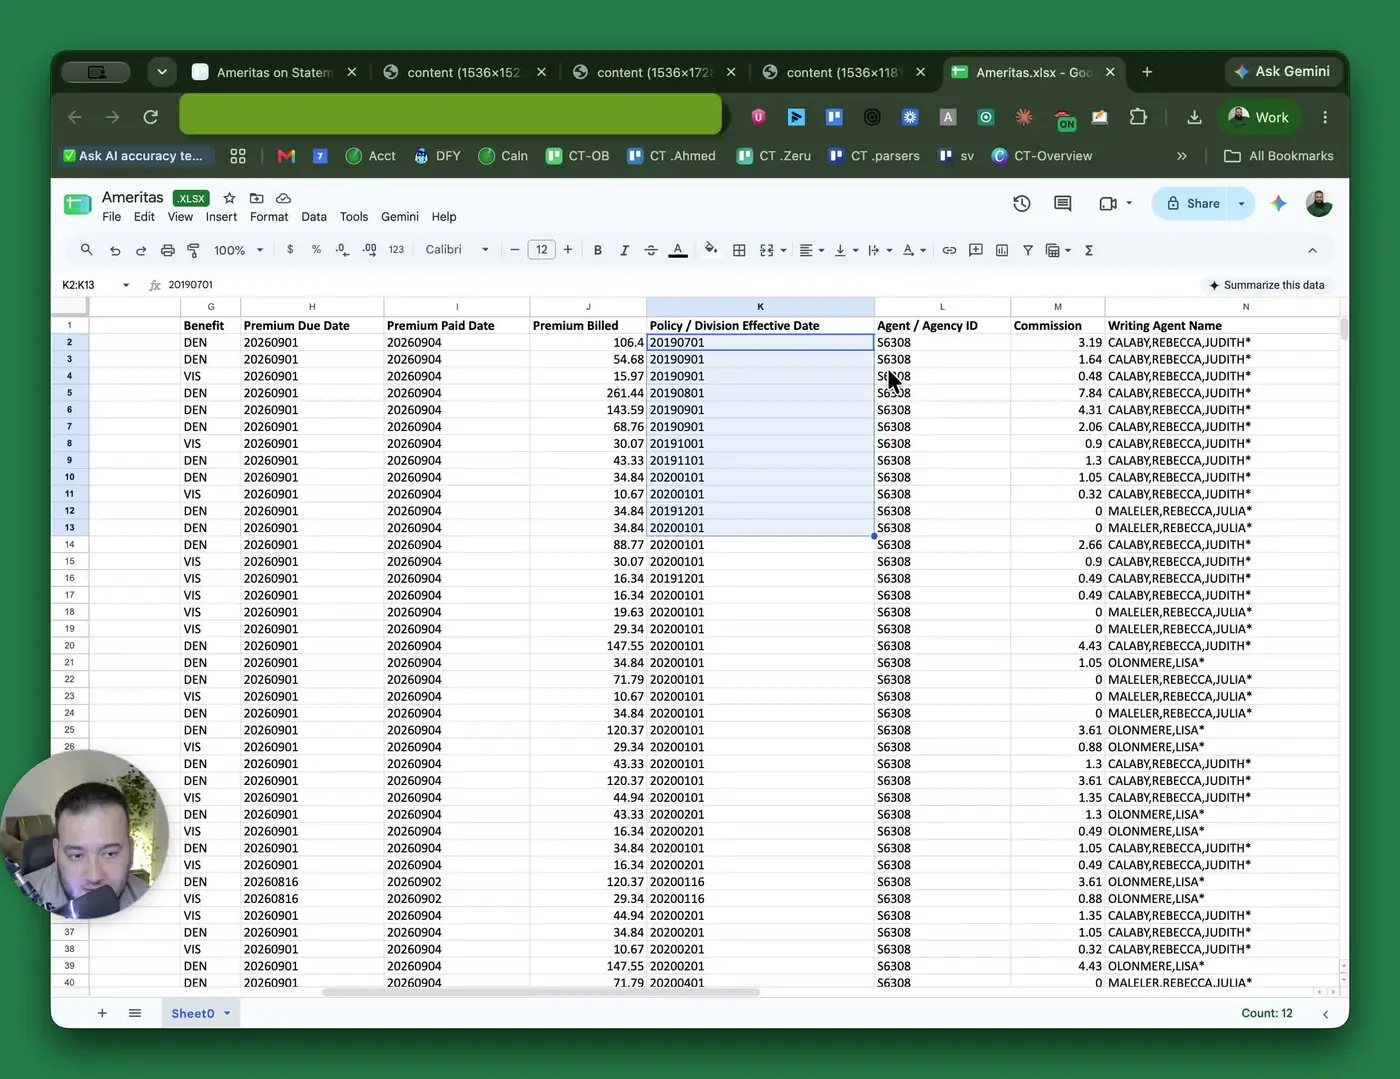
- Review the Agent or Agency ID to confirm the Ameritas identifier.
- Check the Commission amount to see what the selling agent earned.
- Confirm the Writing Agent Name to identify who sold the policy.
- Review the Override amount to identify the agency’s share.
- Check the Policy Type to determine whether it is an individual or group policy.
- Verify the Writing Agent AWN (Agent Writing Number) for the selling agent.
8. Confirm cross-reference and payment information 3:34
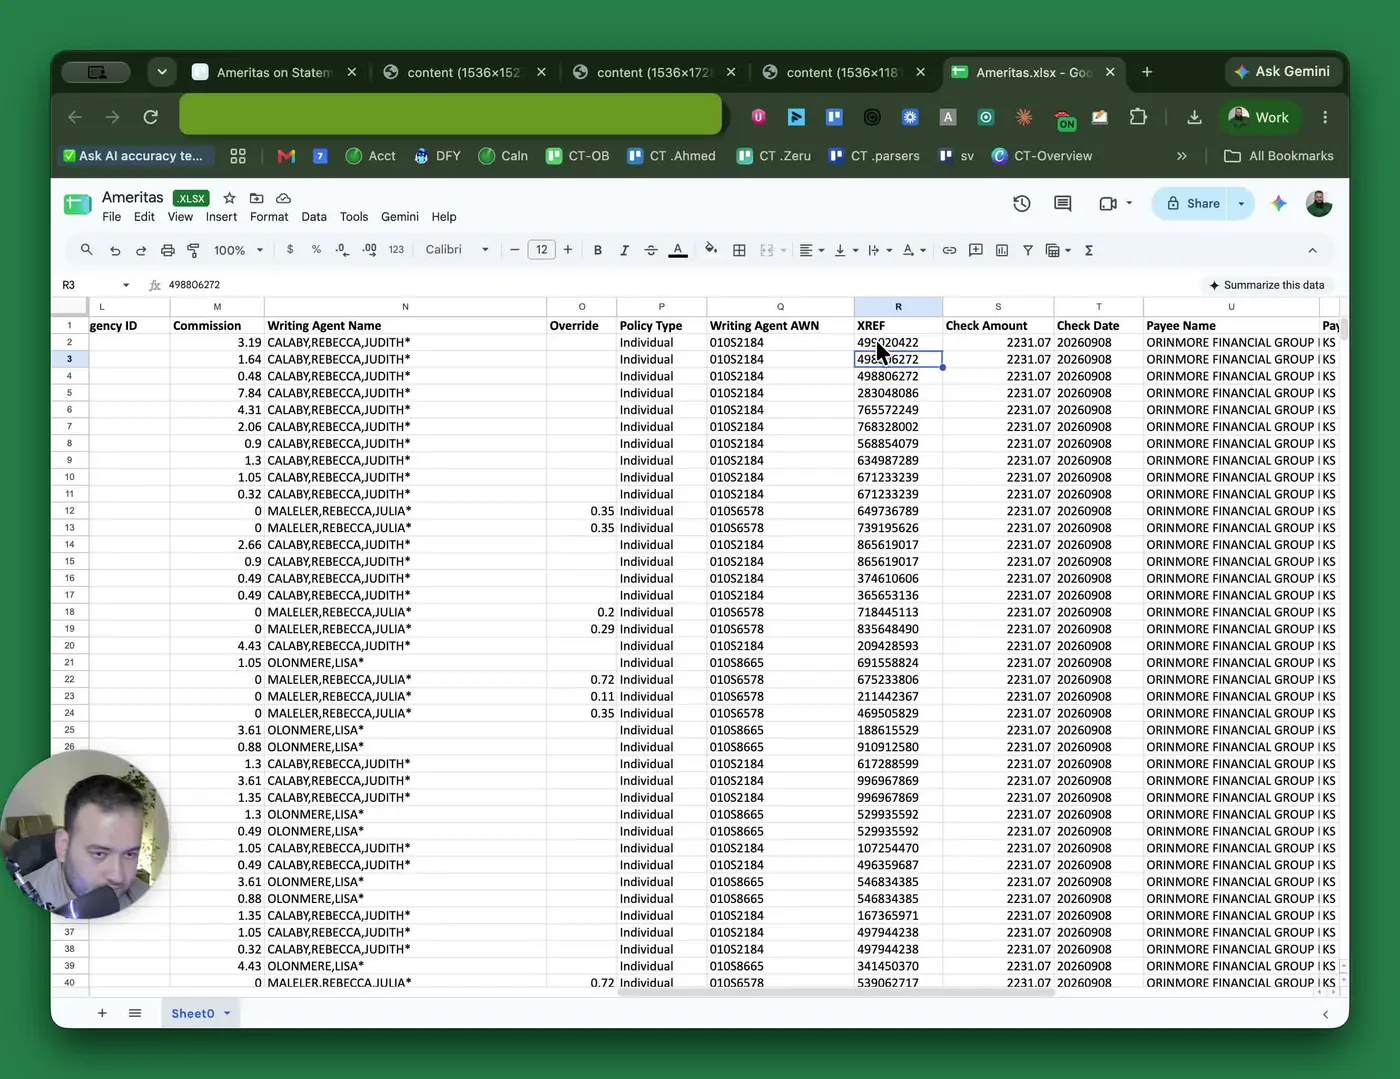
- Review the XREF field, which is the cross-reference/client ID with Ameritas.
- Check the Check Amount to confirm the total paid for the statement.
- Review the Check Date to see when Ameritas issued payment.
- Confirm the Payee Name to identify who received the check.
- Review the Payee State to confirm the operating state.
- Check the Writing Agency AAN, Writing Agency Name, and Writing Payee AAN to verify agency account details.
9. Identify offsets and commission year 4:36
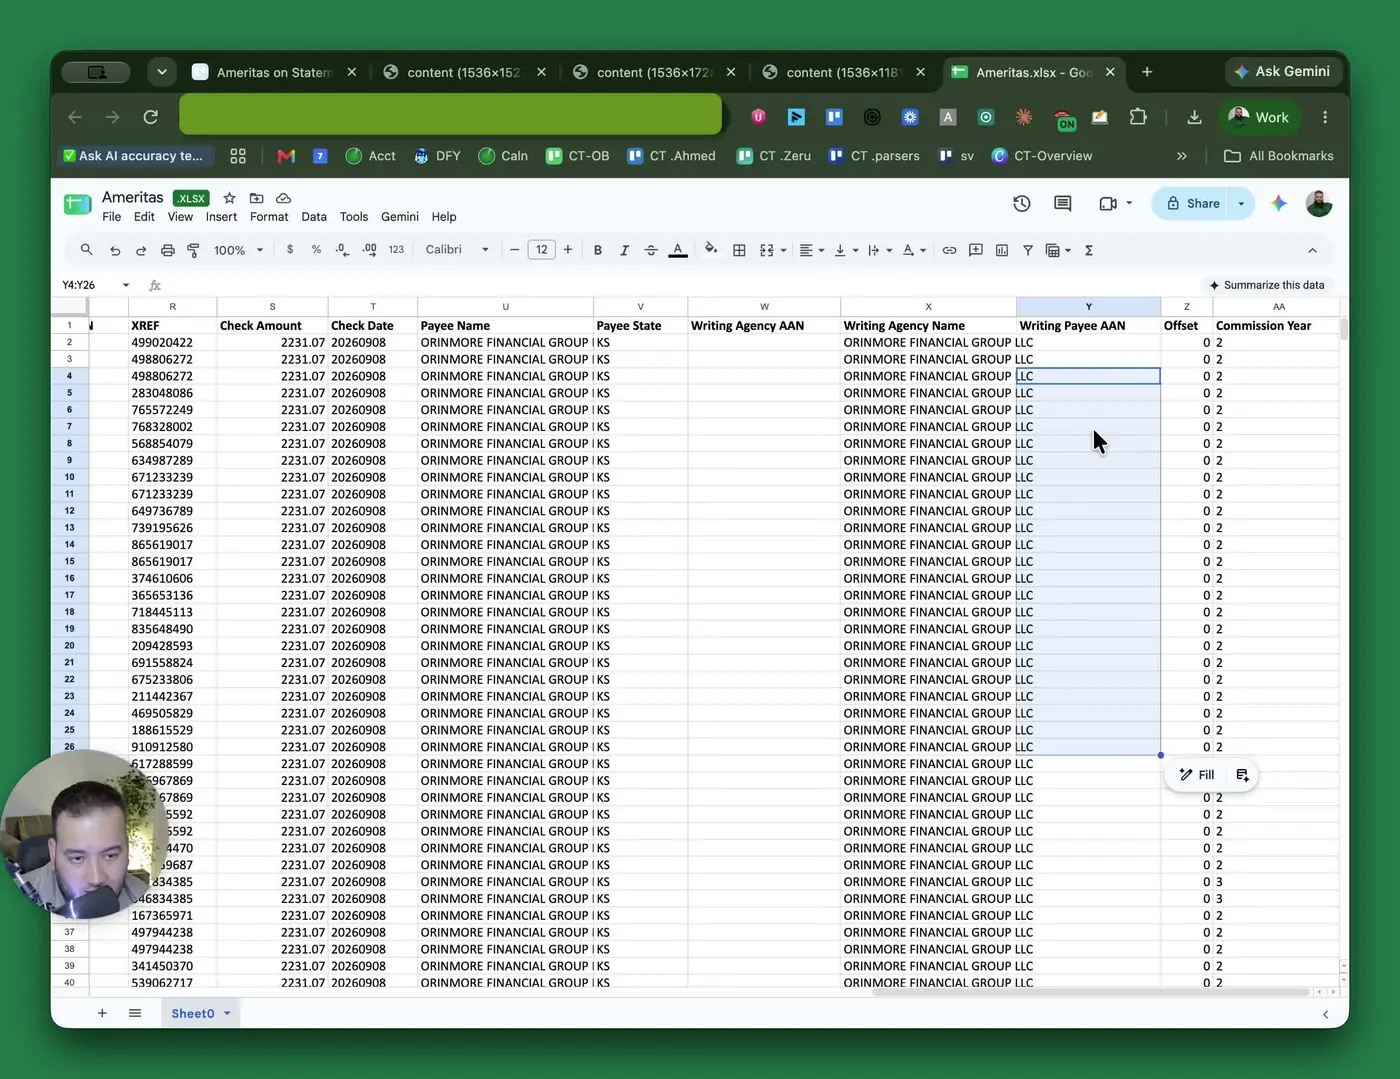
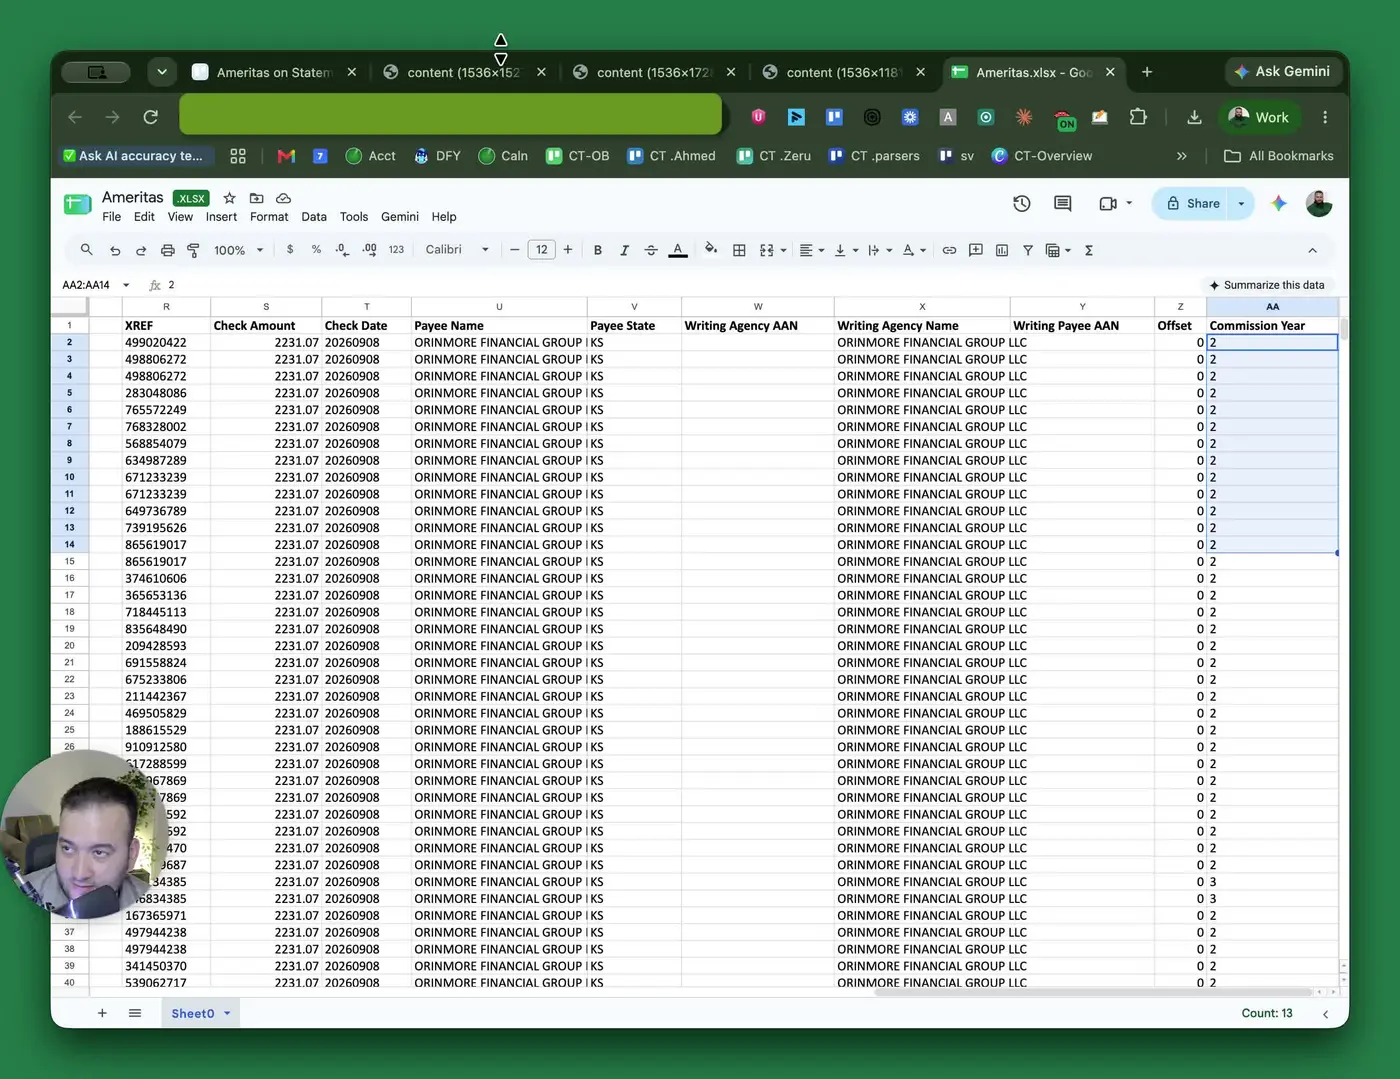
- Review the Offset field for any money taken back or chargebacks.
- If an amount appears in Offset, treat it as a chargeback or reversal.
- Check the Commission Year to determine the policy year.
- A 2 typically indicates a second-year renewal after the advance period has ended.
10. Use ComTrack Retrieve for automated statement downloads 5:02
- If you want to avoid manual downloading, use ComTrack Retrieve.
- Enter your username and password into ComTrack Retrieve.
- Use the tool to automatically pull commission statements from supported portals, FMOs, and carriers.
- Select the desired date range and retrieve statements without manually navigating the portal.
Cautionary Notes
- Do not confuse the Compensation page with the Reports page; the transcript specifically instructs users to click Report after entering Compensation.
- Download statements carefully one at a time to avoid missing files or saving the wrong report.
- Subsidiary may not be relevant for agents and can often be skipped.
- Offset values indicate chargebacks or money taken back and should be reviewed carefully.
- Commission year values matter; a second-year value usually means a renewal, not an initial advance payment.
Tips for Efficiency
- Use the payment period filter to narrow results before downloading.
- If you regularly pull statements, use ComTrack Retrieve to automate the process and save time.
- Keep a consistent folder structure for downloaded statements by carrier, month, or client.
- When reviewing statements, scan the fields in this order for faster validation:
- Carrier/Policy identifiers
- Dates and premium amounts
- Agent/agency details
- Check and offset information
- Save a copy of the statement after download so it is easy to reference later.